Contents
Water is one of the most interesting photography subjects around. Not only is there so much of it but it takes all sorts of forms and colors that are a joy to photograph. Glare and flow can sometimes present unique challenges but with this guide, you’ll be snapping like a pro in no time at all. Let’s take a look at the photography of water by starting with a useful tool: the humble polarizing filter.
Polarizing filters and water photography
Polarizing filters are incredibly handy for shooting in the outdoors. They are used to reduce or eliminate light coming in at scattered angles. This scattered light creates glare that makes it hard to see objects beneath the surface of the water. Polarizing filters also enhance color contrast and saturation to give images a bit of zest that’s immediately obvious.
It’s important to keep my light source perpendicular to my position for maximum benefit. The sun should be at my side instead of in front of behind me as I shoot. But if I can’t quite stand in that manner the filter will still reduce a lot of the glare from the surface of the water.
I then rotate the filter until I get the amount of reduction I want. Keep in mind that circular polarizing filters (CPLs) reduce light by 1-2 stops. A stop is a photography term that describes a doubling or halving of the amount of light available. Therefore, I’ll need to compensate for the lost exposure in other ways. I can increase my shutter speed, open my aperture, or raise my ISO.
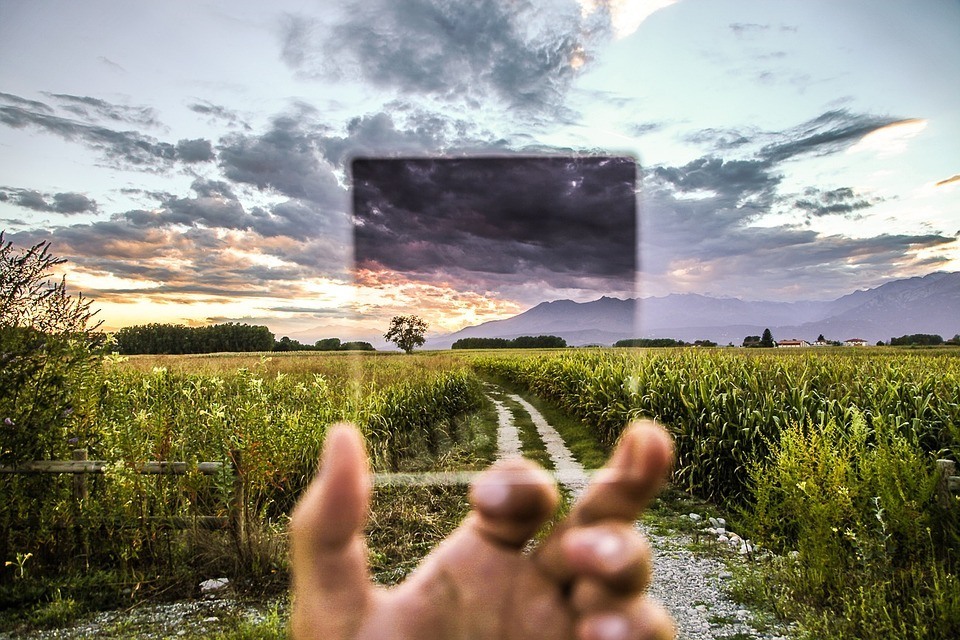
Photo by SplitShire / CC0 1.0
Work with reflections
While I wanted to get rid of them using polarizing filters what if I worked with them instead? Reflections can offer good opportunities through creative composition.
This image works so well because of the reflections on the surface of the water. We see clouds, a bright blue sky, and the branches of a tree. You can almost feel the sunshine and the wind on your skin. The image would still be beautiful using a polarizing filter to remove the glare but would be rather ordinary as well. In this case the reflection actually adds to the image.
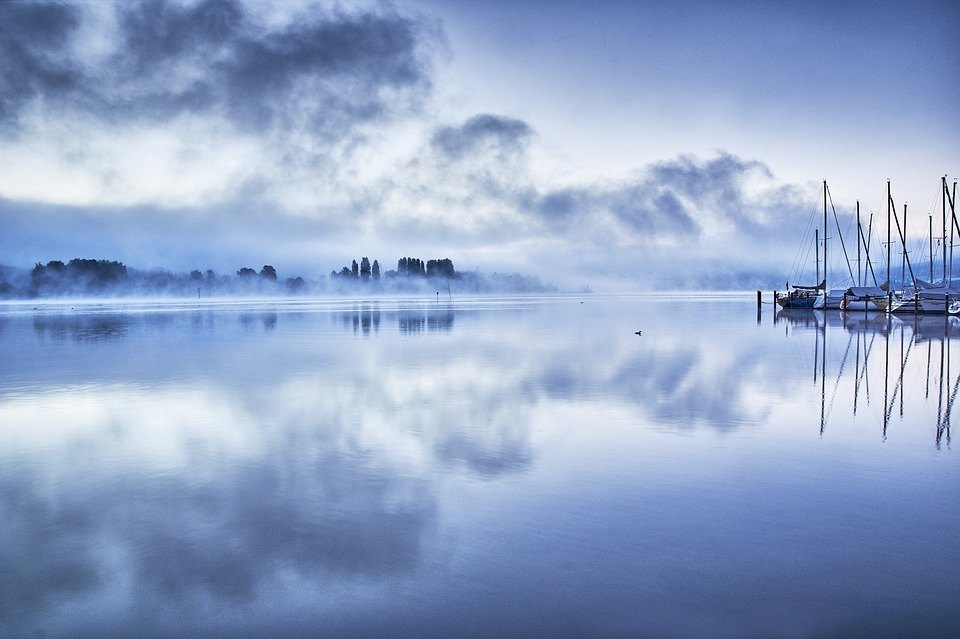
In this example the water almost mirrors the land and sky above it. While the horizon is slightly off it still creates an incredible double image through clever use of reflections.
Rainfall photography
Often when the weather turns rough photographers think it’s time to pack up and go home. Nothing could be further from the truth. Rain photography is very interesting and quite easy to do as long as you have adequate protection. While professionally crafted sleeves exist for digital cameras an increasing number are weatherized to prevent up to moderate rainfall from damaging the components. They use rugged magnesium alloy and rubber seals to prevent water entry. If you have a rubberized body also remember that the interchangeable lens you pair it with should be rubberized as well or you’ll end up making a very costly mistake.
Rainfall photography is all about manipulating shutter speed. This element of the exposure triangle allows me to control the appearance of the water droplets. If I want rain drops frozen in mid-air, I’ll need to use a faster shutter speed to freeze the action. If I want a certain effect of falling water, then I use slower shutter speeds.
How fast and how slow depends on the speed of the rain so I’ll need to experiment accordingly to get my settings right. But 1/60th of a second is a good start for a curtain effect while 1/500ths of a second is a good place to try freezing the rainfall. When using slow shutter speeds remember that image stabilization is important. A tripod works best but if my camera has optical stabilization built into the lens or sensor stabilization I can shoot handheld confident that motion blur won’t ruin my image.
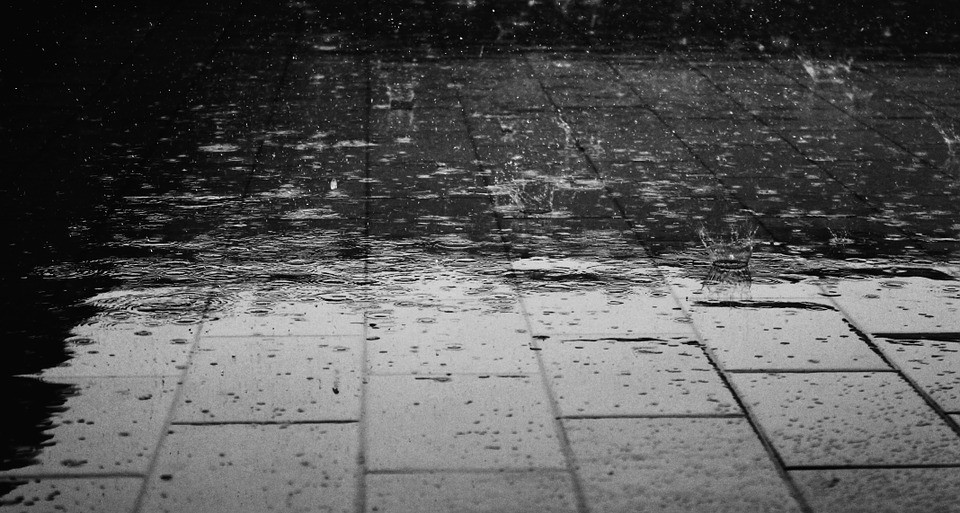
Also, remember that adjusting one portion of the exposure triangle means another has to be adjusted to maintain exposure. If I like my exposure at 1/60ths of a second and decide to increase my shutter speed, I am reducing the amount of light entering the scene. Therefore, I need to adjust either my aperture or ISO to allow in more light. Or there’s always the Exposure Compensation tool for a blanket increase in exposure without the other effects of adjusting aperture (depth of field changes) or ISO (noise increasing or decreasing).
The image can also feature more than just rain. Rain falling onto the texture of a city street, for example. Or rain falling around a single flower to invoke spring showers. As always, think about the other elements of the image beside the main event. How does it all come together?
Smooth moving water shots
No doubt you’ve seen images where mountain streams and waterfalls exhibit a stunning curtain effect. Like rainfall photography, shooting running water involves making creative use out of shutter speed. But there are challenges that need to be considered.
Slow shutter speeds for rainfall are around 1/30ths to 1 second to get a good curtain effect. Creating a curtain effect for running water can take as long as 3-4 seconds, or even longer, depending on the speed of the water. If you’re shooting in broad daylight your image is going to be hopelessly overexposed. So what can I do?
Neutral density filters. These specialized filters act to reduce the amount of light entering the camera. At first, this seems counterintuitive. After all, we want light as photographers, so why would I ever want to filter it out? Because in this case there is too much of it.
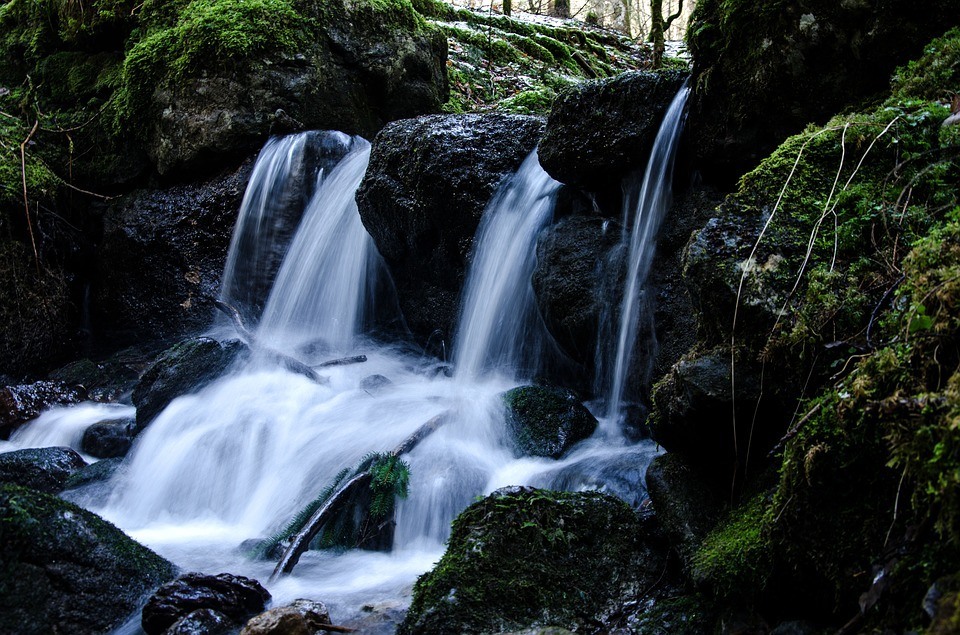
Photo by AlexanderEbhart / CC0 1.0
With a neutral density filter, I can reduce the amount of incoming light while using a longer exposure. The trick is to find the neutral density filter that pairs best with the shutter speed I need to create a smooth curtain of moving water. These filters are rated as ND-#. An ND 2 filter reduces light by 1 stop.
An ND4 filter reduces incoming light by 2 stops. An ND8 by 3 stops. And so on. I might start with an ND 4 filter and a shutter speed of 3 seconds. This means using Manual or Bulb mode and a tripod, of course. No amount of image stabilization will keep a camera steady shooting hand held for 3 seconds. A remote shutter is also a great idea to keep my hands from shaking the camera when I depress the shutter.
I then study the results and adjust my aperture, ISO, shutter speed, and filters accordingly to get the best results I can. I can even stack ND filters if I don’t have enough light reduction for my needs though I run the risk of some slight vignetting in the corners of the image.
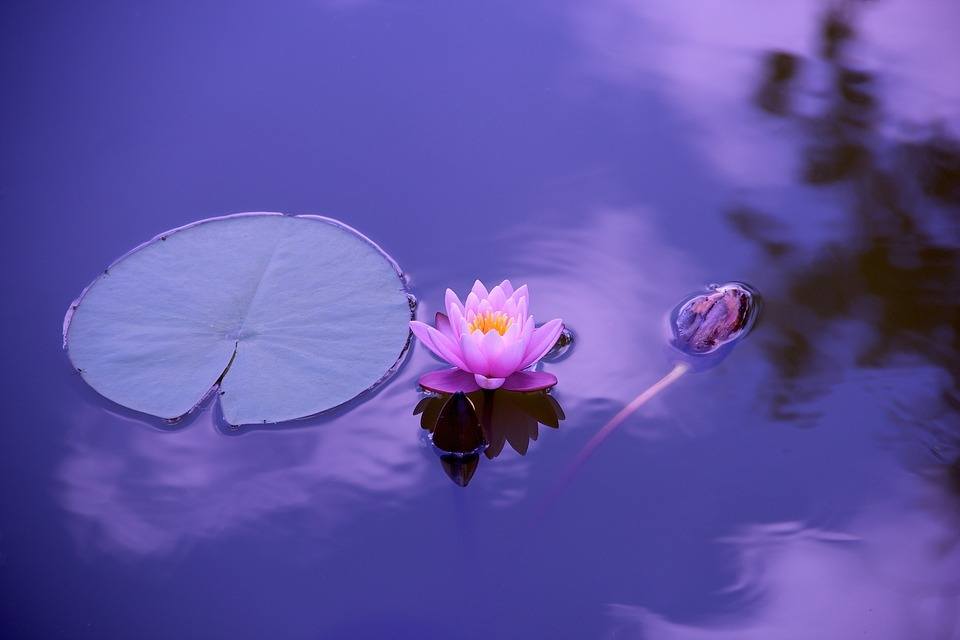
Smooth water shots also work with large bodies of gently moving water as well as swiftly moving ones. The gentle laps of water on the beach or wind stirring the waters of a lake can give a very nice gentle blur to the surface of the water using a slower shutter speed and the same techniques as before.
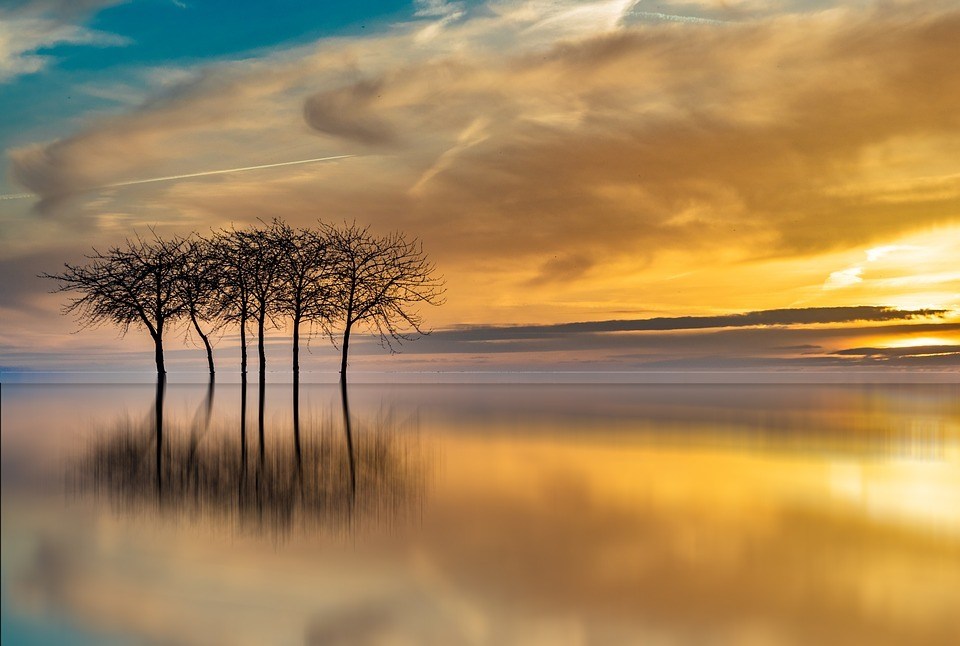
Photo by herbert2512 / CC0 1.0
Photographing drops of water
There’s an immense amount of beauty in all moments but the singular one where a drop of water makes contact with a pool of it is something photography is especially well suited to capture. We’ve all seen photos of water droplets frozen in mid-air. Or perhaps splash-back from the pool reaching up into the air. Or even the crater formed in the moment of impact. To capture these, we need great lighting and high-speed photography gear coupled with a bit of persistence.
The three major tools I need are a tripod, remote shutter, and flash unit. The tripod serves to keep the camera stabilized even if I need to twist the camera into strange angles to get the composition I want. The remote shutter ensures I can keep my hands free of the camera and avoid jostling the setup as much as possible. And the flash unit proves extra exposure. I can use either an off-camera flash synced to my camera or the attached flash unit. If I place a white board behind my subject the bounced lighting will give a nice even exposure as opposed to directly lighting it with the flash and potentially creating harsh shadows.
I also need a stand with a clamp attached. The stand and clamp will hold a sponge soaked in the liquid I need to take pictures of. As it slowly drips into the container my hands are free to adjust settings, take pictures, and perhaps most importantly, not get liquids all over my delicate electronics.
After that, it’s as simple as capturing the drop falling. Which as it turns out is quite challenging. If my camera has a decent continuous burst rate, I can set it to fire as the drop falls and hope for the best. Otherwise, it’s better to use an intervalometer. This tool is a type of remote shutter only it sets the frequency and duration of a series of shots. I can tell it to do 10 shots at 1/500ths of a second, for example. Some cameras have intervalometer features built in so take a good look at the user manual.

Check the tides
While checking the weather may make sense I should also think about the tides. If I decide to do some beachfront water photography the tides will drastically alter the scenery in some cases. Caves that are underwater during high tide can become accessible and give great vantage points when exposed during low tide. Tides Near Me is one of the best and available free for iOS and Android devices.
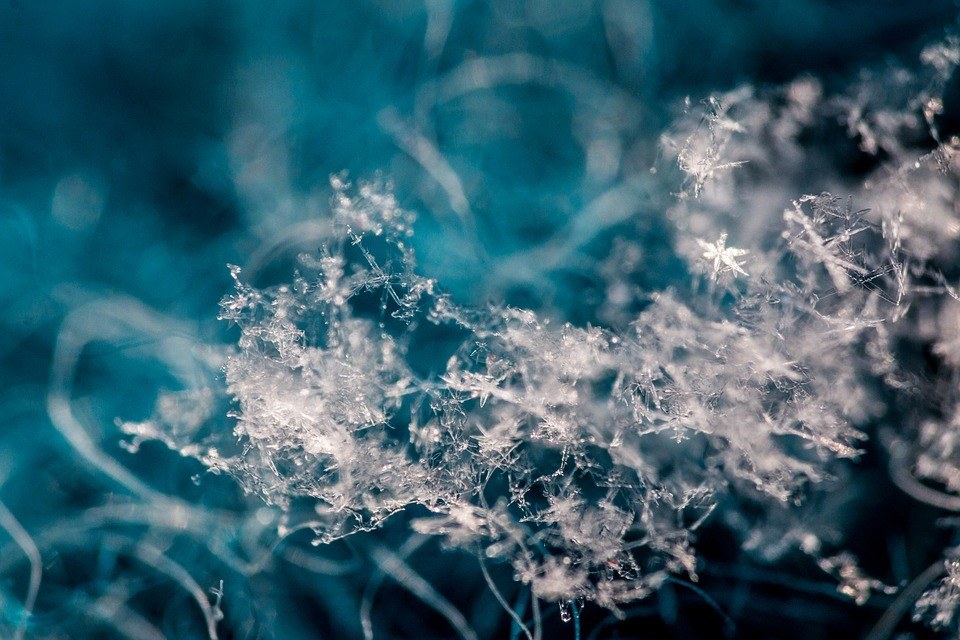
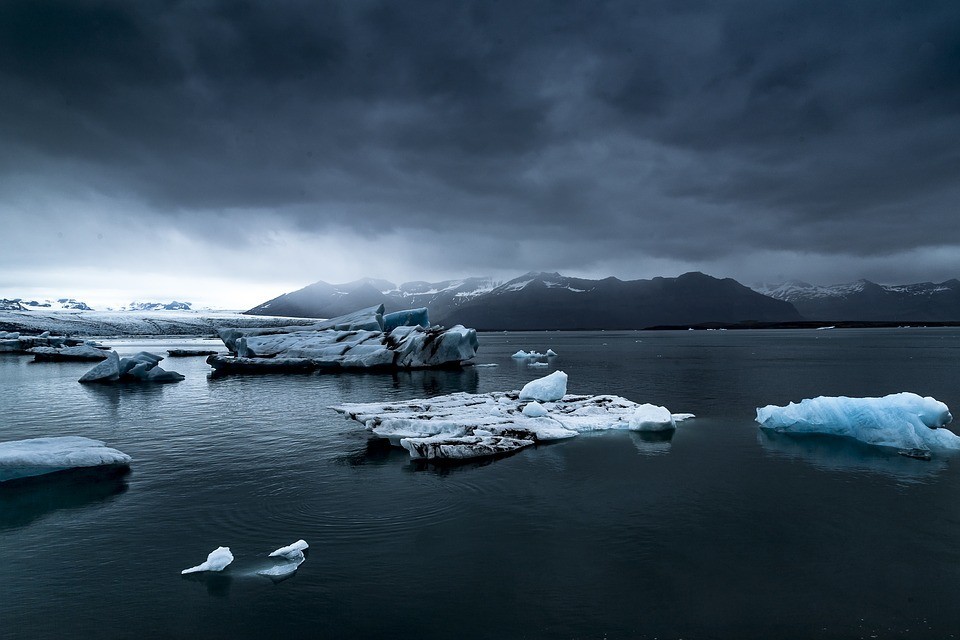
Ice is also water!
Let’s not forget about frozen water. While most of us think of the unpleasant consequences of living in colder winter climates ice also offers some good opportunities. When frost hits one of the best things I can do is try using a macro lens to capture images of snowflakes and ice crystals. A true macro lens is a camera lens that offers 1:1 magnification or greater. This means that the image being projected onto the sensor is true to life or larger.
And if snowflakes and frost crystals interest you take a look at super macro lenses. They tend to be relatively cheap as they’re a fairly specialized item yet offer as much as 1:5 magnification! I can blow up snowflakes to take up most of the image. The extremely shallow depth of field makes these lenses a challenge to work with. Depth of field is how much of an image is in sharp focus. And even with a narrow aperture like f/11 to give me good focus there will still be a fair amount of background blur. But from a creative standpoint macro and super macro lenses are absolutely incredible for lovers of snowflakes and ice.
If I decide to gear up and head to the far north or south icebergs abound in the polar oceans. Photographing them generally requires a boat yet is immensely rewarding. Showcasing the scale of the icebergs is one of the best ways to create a dramatic impact which may mean wide angle fields of view.
Good wide angle lenses sit at around 10-20mm in focal length for a full-frame camera and give dramatic views of the horizon. With lenses like these I’m taking images that qualify as landscape photos as much as water subjects. Water, ice, and air come together to gorgeous effect. Glaciers are another place to easily photograph ice.
Conclusion
Water photography is unique because there are so many approaches and techniques to it. It ranges from easy to challenging and offers something for everybody. Remember your CPLs and tripods if you’ll be outdoors and maybe investing in a camera body that’s weatherized. All it takes from there is a little willingness to explore and maybe get wet.
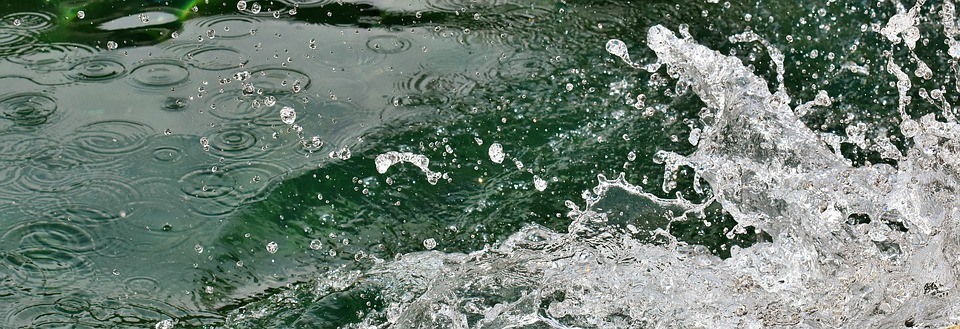
Photo by Alexas_Fotos / CC0 1.0
Sources:
https://photography.tutsplus.com/articles/an-in-depth-guide-to-long-exposure-water-photography–photo-9364


