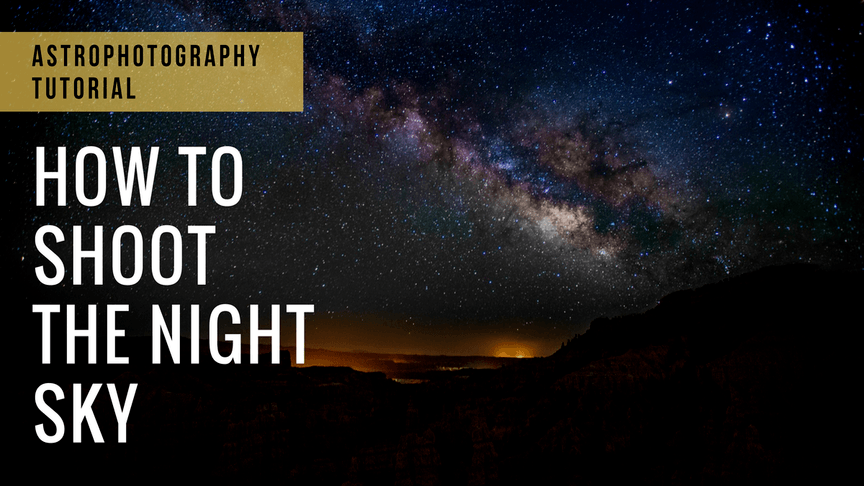
Contents
Astrophotography is all about the night sky. But it’s not nearly as simple as pointing my lens upwards and clicking the shutter. The night sky is a challenging photography environment because of the low light levels and targets that are sometimes extremely bright or too faint to be seen. Light pollution can run rampant and sometimes the best targets are seasonal. With this guide, I’ll be walking you through the basics of astrophotography and hopefully help you capture stunning stellar images.
Tools of the trade
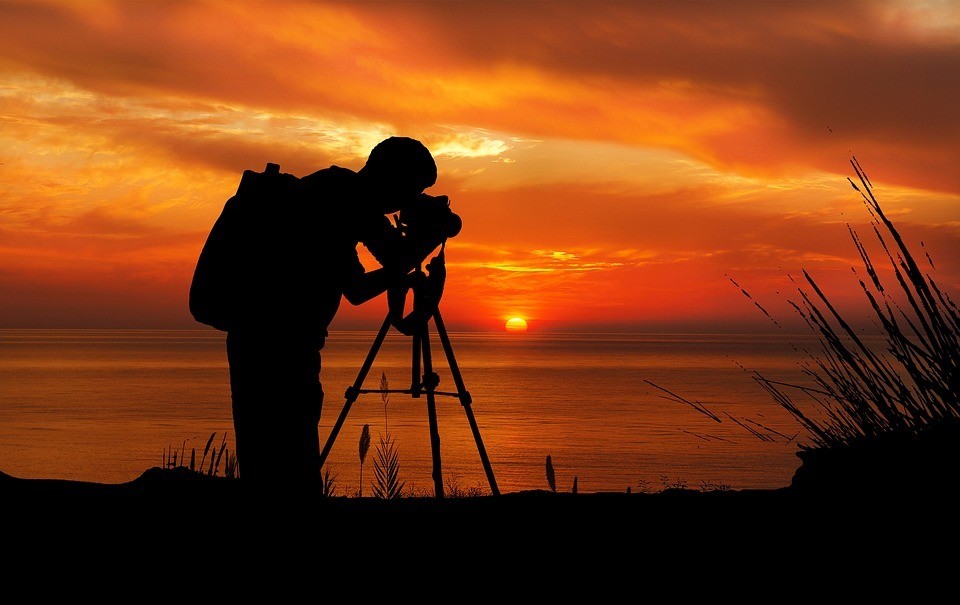
A good tripod is one of the most important considerations. Tripods provide much-needed image stabilization. And when I’m using shutter speed exposure times that can run from 30 seconds to a few minutes even the slightest shake can cause unacceptable levels of blur. So shooting handheld is out of the question.
A remote shutter is also pretty useful for astrophotography. They come in two forms: cable release and remote release. Cable release shutters are tethered to the camera via a cord that can run from a foot to a couple of meters in length. Remote releases usually rely on a unit attached to the hot shoe of the camera to control the shutter. But they also come in forms such as smartphone apps that let you pair your phone to the camera to control the shutter. Either one will serve and prevent the slight shake of a manual finger press from ruining a great long exposure photo.
There are many other wonderful apps out there that are of great benefit to the aspiring astrophotographer. They’re listed for each section but it’s well worth searching out others to see what tools will help you along the way.
Essential Tools
Intervalometers are also something to consider. An intervalometer is a special timer that’s used to set your camera to take a series of photos at a specified shutter speed, duration and/or number. So instead of having to sit and manually press the shutter after each exposure I can set the camera to 30 photos at 30 seconds each and let the intervalometer take over while I sit in a warm car.
Many cameras have intervalometers built in nowadays, especially ones with composite photo options like the Olympus OM-D E-M1 Mark II. But if your camera doesn’t pair it with an app or device that makes taking astrophotography that much simpler.
Finding the Best Astrophotography Locations
In the world we live in today it’s actually quite difficult to find untouched dark sky suitable for the best astrophotography. This is due to what’s called “light pollution.” Light pollution is all of the wasted light that streams up into the atmosphere from cars, streetlights, rooms, buildings…The collective glow of civilization leaking energy out into space.
That light is scattered by the atmosphere and creates a haze, often purple in color, that drowns out most of the fainter stars in the sky. The larger the city and the closer you are to it the worse the effect gets. You may only see a few bright planets in and around the largest cities.
Fortunately, in this digital age, I can use a variety of apps to help me find the best areas to start shooting. Apps like Dark Sky Finder for iOS and Light Pollution Map for Android show which parts of the world are far enough away from major urban areas to show skies full of nebulae and galaxies.
But even if I find the right location how I know if those incoming clouds will add ambiance or hail to my scene? Apps come to the rescue include Weather Underground for iOS and Android. Knowing the forecast will allow me to ensure both my gear and myself are rainproof if needed.

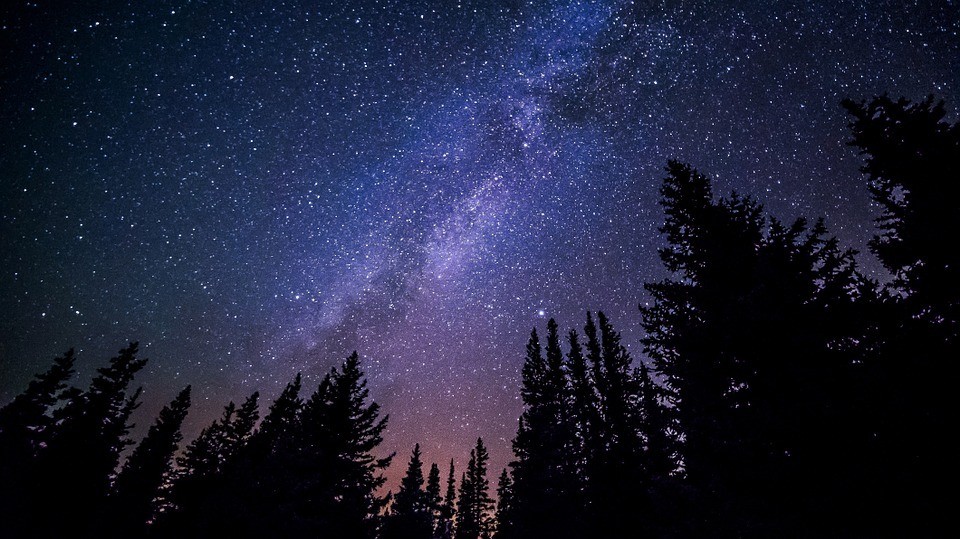
The Milky Way
The galaxy we live in is one of the best targets for astrophotography. Nothing serves as a better reminder to the greater Universe above our heads than the star shrouded core of the galaxy that’s almost impossible to see with even a little light pollution.
The Milky Way is inconsistent in its visibility even without light pollution as a factor. It’s always at least partially visible since we’re inside of it, after all. But in the Northern Hemisphere, the Galactic Core is only visible from late April to late July and sits in the southern sky. In the Southern Hemisphere, the core is visible from February to October.
Milky Way Apps
But if I’m uncertain of where the Milky Way is or there’s more light pollution than I’d like I can always use apps to help me. Stellarium is one of the best for locating the Milky Way in all conditions. By entering a location and time the app will show its position in the sky then as well as the position and brightness of the moon.
The moon is a great astrophotography target in of itself but it’s far too bright when you’re trying to shoot the Milky Way. A quarter phase is still workable but it gets progressively harder to shoot, especially if the moon starts crossing near the galaxy itself. The darker the night the better.
Milky Way ISO Settings
I’ll want to use moderately high ISO values when shooting the Milky Way. The exact value depends on your aperture, shutter speed, the size of your sensor, and how well it processes image noise. But ISO 1600-3200 is a good place to start for APS-C or full frame sensors.
You can also try longer shutter speeds if you’re afraid of noise becoming an issue that if they become too long you’ll start getting star trails due to the rotation of the earth smearing the starlight across the wide open sensor. While star trails are the topic of the next session we don’t want them in Milky Way photography.
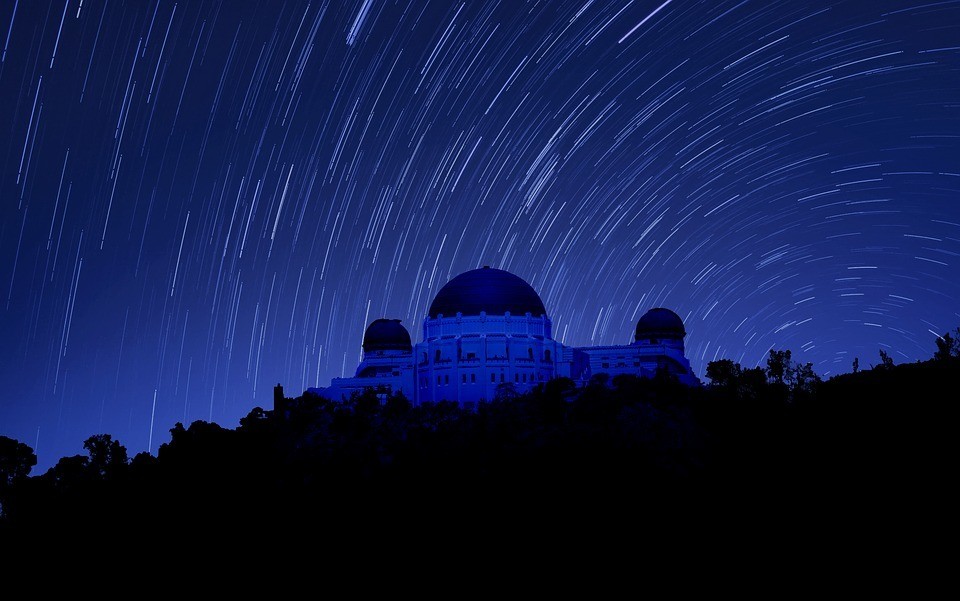
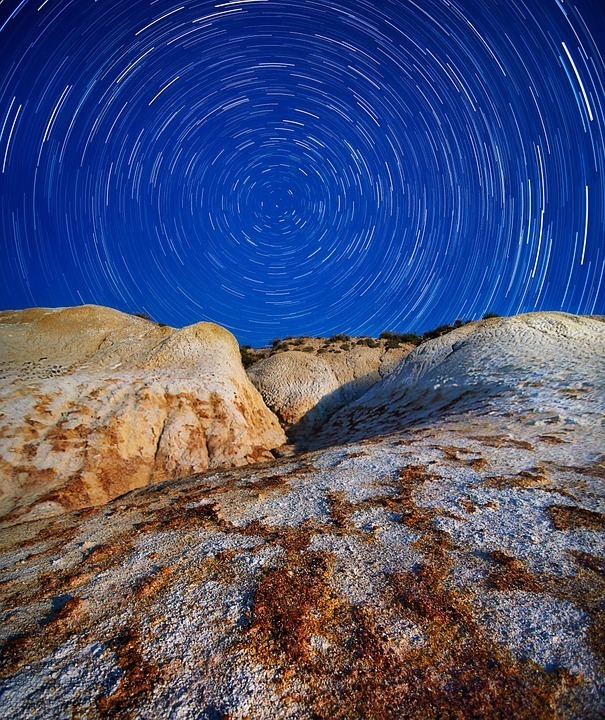
Star trail photography
This is a classic art that never fails to impress. We all know that the earth rotates on its axis. But what isn’t obvious because of the slowness of our perception of time is that the stars move across the sky. And with the right setup, a camera can capture this motion.
With enough time the stars move full circle and return to the same position relative to the observer and their location on the earth. This is called a sidereal or stellar day. Stars rise in the east, cross the sky and set in the west. The ones closest to Polaris (the star of the earth’s axis is oriented towards) will create small circles while those furthest away and closer to the equator will make much larger circles.
Recommended Accessories
If I want to capture these invisible natural wonders, I’ll need a tripod and familiarity with the manual settings of my camera. ISO and shutter speed are the main components of the exposure triangle I’ll be looking at. Wide angle lenses are best because they give me maximum sky coverage.
If I’m using a full frame camera I want a lens around 14mm to 24mm. 8-20mm works nicely for an APS-C sensor and both will give me a nearly panoramic view of the sky. But even narrower focal lengths like 35mm and 50mm work depending on the scene. An observatory with only part of a star trail showing is just as interesting as a star trail circle around the entire sky. Also, keep in mind that the longer the focal length the more the star trails will change in a given period of time. So if you want faster results the 35mm lens will give quicker trails compared to the 14mm one.
The moon is actually of benefit when doing star trail photography because you’ll usually include some of the landscape like mountains or buildings and the moonlight will bring out their details. You’ll want to shoot away from the moon in order to find the brightest stars.
Astrophotography Exposure
The technique is simple in its essence. Once you’ve chosen your location, focal length, and ISO you’ll set the camera to take long exposure photos in succession. The exposure time will vary depending on the local light levels, your lens focal length and aperture, and how long you want the trails to be but 30 seconds per image is a good start.
I also want to ensure my camera is pointed right at Polaris, the North Star (or Sigma Octanis in the Southern Hemisphere). By using the pole star, I ensure the image will show a single central point with all of the stars rotating around it in successively larger circles. Once again apps come to the rescue, with Polar Finder for Android and Polar Scope Align for iOS being popular choices.
Astrophotography ISO Settings
My ISO should be on the low side because I’m using such long shutter speed times. Normally I’d raise the ISO in dark settings to increase the camera’s light sensitivity but with a long exposure time, the sensor will collect plenty of light. Start with ISO 200 and slowly work up from there to see how the images look with the selected shutter speed.
Usually, you’ll need an intervalometer to time the photos properly but some cameras have this feature built in. If your camera has an interval timer mode that serves the same purpose. You’ll also need to control the elapsed shooting time or the total number of exposures. You may choose to set it to keep taking 30-second exposures for an hour or simply select 120 exposures for the same series of photos.
The result will be a huge collection of files where the stars barely seem to move. But if you compare the first and last images you’ll see that the stars have shifted over time. And by taking the series of images and combining them in Lightroom or specialized Star Trail software, you can get a single image that shows the entire range of star motion across the night sky!
Some cameras like the Olympus OM-D E-M1 Mark II have star trail modes built in to allow you to create composite images like these. So far it’s quite rare to have this feature in lower end models but within a few years, it may become as standard as high dynamic range mode is today.
Astrophotography and Surrounding Landscape
The sky isn’t all there is
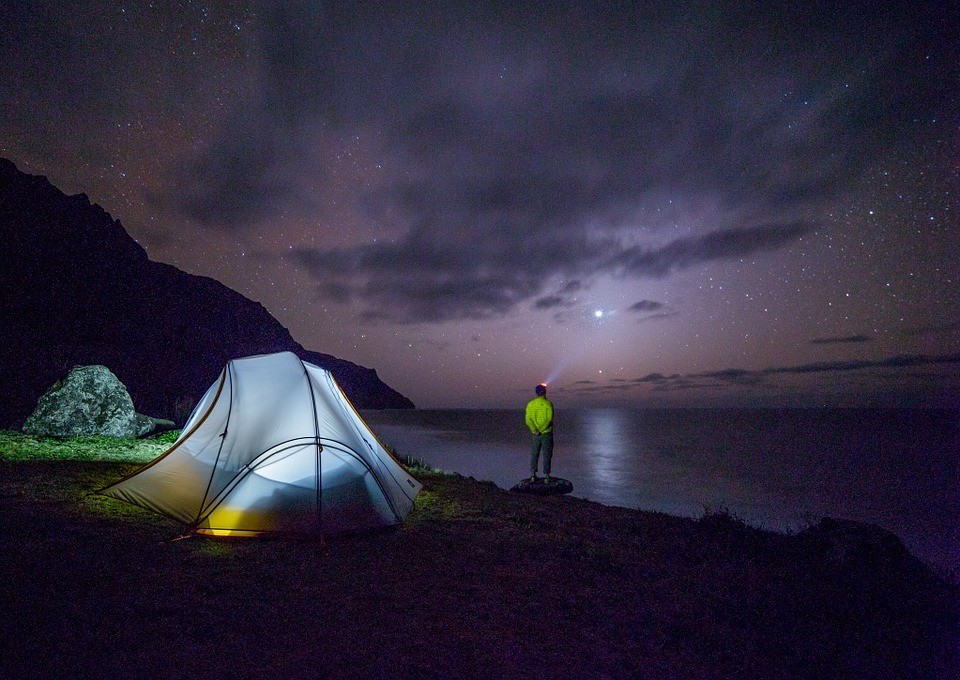
While it seems obvious that the sky is my main subject with astrophotography I should give as much thought to the surrounding landscape. Most astrophotography images will include the surrounding lands, rocks, mountains, distant buildings, people, and more. A tiny person peering up with a headlamp add contrast and a sense of scale to the night sky. Also, the long exposure times often mean that the surrounding landscape will be well lit enough for details to show through.
If I’m in a desert canyon I might let natural archways frame the Milky Way or the moon. I can also let my headlamps illuminate rock walls or simply look up while remote shooting the night sky. Creativity in the composition is the key here. Don’t make your sky photos just about the sky. The landscape tells just as much of a story.
Conclusion
Astrophotography is technically challenging in many ways. The exposure is very difficult to get right because I have both extremely dark and extremely bright sources of light to work with, often in the same location. I have to know exactly when a long exposure is needed versus a high ISO instead. And how much of each is just enough?
There are no set numbers involved, either, because every scene is different from the last. The numbers that worked nicely for the full moon night a few nights back won’t work for the half or quarter moon. Or the full moon under a partially clouded sky. Every time you decide to do astrophotography you’ll be recalibrating and refining your techniques.
So if you’re up to the unique exposure challenges of astrophotography get started with a tripod and familiarizing yourself with working with exposure in full Manual mode. Good luck out there!
Sources:
https://www.davemorrowphotography.com/2012/03/StarTrailsPhotographyTutorial.html


