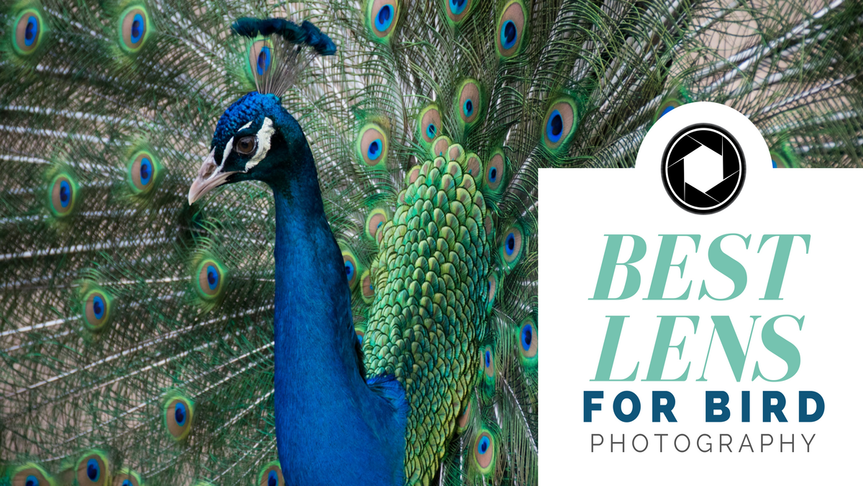
Contents
- So what sort of lens do I need?
- Best Canon Lens for Bird Photography
- Best Nikon Lens for Bird Photography
- #1. Canon EF 100-400mm f/4.5-5.6L IS II USM Lens
- #2. Nikon AF-S NIKKOR 200-500mm f/5.6E ED VR
- #3. Tamron SP 150-600mm F/5-6.3 Di VC USD
- Monopod vs tripod
- Polarizing filters
- Composition tips
- The Human Element
Luckily, I have technology on my side. With the right lens, I can drastically shorten the apparent distance to get excellent close-ups of birds in action. Best of all, the more distance I have, the more likely the birds are to continue showing off their native behavior.
Photo by Earl Goodson
So what sort of lens do I need?
Zoom lenses are key but not all zoom lenses are created equally. Any lens that adjusts its focal range is a zoom lens. Even if it’s 24-70mm, which is fine if I’m taking portraits of a person. But if I try to use that with wildlife, I’ll quickly find it doesn’t have nearly enough reach.
The answer to the initial question is: I want as much reach as I can afford. Canon telephoto zoom lenses are some of the best on the market for the DSLR user. They offer the highest quality in optics and nearly all have built-in Image Stabilization to help with the shakiness that’s magnified when using telephoto focal lengths.
Best Canon Lens for Bird Photography
The Canon EF 100-400 f/4.5-5.6 would be an excellent choice. That range gives us plenty of space to stand apart from our subject and image stabilization to negate handshake while tracking targets. F/4.5 is an average aperture for a zoom lens but not at all bad.
However, at retail pricing, it’s out of reach for all but the most dedicated photographer.
The Canon EF 70-200mm f/4 is an excellent budget choice at even at retail value. With a constant f/4 aperture, I won’t lose exposure as I extend to maximum zoom.
Notably, it does not have as much zoom reach as the first lens. But having good quality glass, decent aperture, and high focal reach means the price of the lens will steadily increase.
There are a number of budget lenses by Sigma and Tamron that are also worth looking at. For $200-$300, you can often get lenses with 50-150mm of reach and an aperture of f/4.5 or so. For the Nikon user, these are also applicable.
Also, remember that used lenses are well worth hunting for. Just make sure you test to see that the glass and autofocus are working properly.
Best Nikon Lens for Bird Photography
If you’re a Nikon DSLR user, you also have some great options. The splurge purchase would have to be the AF-S NIKKOR 80-400 f/4.5-5.6G telephoto zoom lens. As you can see, this lens can pan back slightly farther than our canon but otherwise has similar statistics. It also has Vibration Reduction to help with motion blur.
Fortunately, Nikon also has a budget version available. The 70-300 f/4.5-5.6G doesn’t use the same expensive optics as the previous lens. But the statistics are still quite good. 300 mm of reach is excellent for even wildlife dedicated photographers. And a retail price that’s much more comfortable.
Like Canon, budget lenses from Sigma and Tamron also exist for Nikon DSLR users. So it’s a good idea to shop around before committing to purchase this big.
A good bird lens needs to have enough reach to target distant subjects. Having a fairly narrow aperture selection like f/4 ensures I can obtain a shallow depth of field for fine portraits.
While f/4 isn’t all that shallow in most portraits the depth of field for a potential image becomes shallower as the focal length grows longer. f/4 will give great results paired with a telephoto length lens.
#1. Canon EF 100-400mm f/4.5-5.6L IS II USM Lens

This L-series (luxury) lens is one of the finest on the market and especially popular with Canon bird photographers. The minimum aperture is f/32 at 100mm and f/40 at 400mm which is useful for capturing an entire scene in sharp focus at the maximum focal length. And with a maximum aperture of f/4.5 you can still capture a nice shallow depth of field. At 400mm the aperture stops down slightly to a maximum of f/5.6 which still gives great results. At $1,899.99 the price is incredible as well given how supremely versatile this lens is.
Given how much focal length provided image stabilization is more important than ever to ensure that photographer handshake doesn’t undo the incredible sharpness provided by this lens. The lens is also dust and water resistant, one of the best features you can have if you spent a lot of time shooting in the outdoors.
One downside to consider is that the lens will be extremely heavy compared to lighter prime or kit lenses. With the large focal range and the sheer number of elements within it’s a giant lens by comparison (3.46 lbs. or 1569 g). But the gains in sharpness and reductions in chromatic aberrations compared to cheaper lenses makes the Canon EF 100-400mm f/4.5-5.6L II one of the best choices for bird photographers.
#2. Nikon AF-S NIKKOR 200-500mm f/5.6E ED VR

Nikon’s answer to the Canon 100-400mm has a lower focal length on wide-angle end but if its birds we want we won’t be shooting up close. The 100 extra millimeters will come in handy for subjects at a range. Unfortunately, the aperture is slightly smaller at a maximum of f/5.6 but it does remain unchanging throughout the focal range.
At 5.06 lbs. or 2295 g it’s significantly heavier than the already heavy Canon lens. But price-wise it’s a few hundred dollars cheaper if purchased new. The minimum focusing distance is also further away than the Canon. The autofocus can target subjects 7.2 feet away or more, compared to 3.2 feet for the 100-400mm f/4.5-5.6. Few wild birds will let you get closer than this very easily, anyway. The only real drawback compared to the Canon is that it’s not weatherized in any way.
#3. Tamron SP 150-600mm F/5-6.3 Di VC USD

Tamron’s offering to the bird photography world has some of the best features of both the Nikon and Canon lenses from earlier. The focal range actually goes even further than the Nikon at 600mm max. The cost is a reduction in aperture and overall exposure. f/6.3 is significantly less light entering the camera for that extra reach but the overall depth of field will be comparable given the increase in focal length. This Tamron lens also includes VC (Vibration Compensation) to ensure handheld shots don’t become blurry.
Brand new the Tamron SP 150-600mm F/5-6.3 Di VC USD is usually around half the price of the Canon EF 100-400mm f/4.5-5.6L IS II USM lens. And like the Canon, the Tamron SP is also weatherized to keep the elements out while shooting. Being a third party lens this Tamron birding lens is available for both Canon and Nikon mounts.
Monopod vs tripod
Tripods are a tool most photographers already have. They are the best form of image stabilization available. But when it comes to fast-moving, shy wildlife, a monopod is actually a better buy.
Monopods have the advantage of being easier to set up and move. When I’m using a tripod, the three legs take time to set and telescope into place. A monopod snaps into place much faster.
A monopod isn’t nearly as stable as a tripod. But it provides plenty of image stabilization in combination with the IS built into your lens or camera body.
Photo by Earl Goodson
Polarizing filters
Polarizing filters are another tool I often use as a wildlife photographer. Any photographer who photographs the sky or water should be using a polarizing filter.
The advantage of a polarizing filter is that they reduce or negate haze and glare from scattered light. Polarizing elements block a significant amount of scattered light while letting in direct wavelengths of light.
When taking photographs of the water, the glare on the surface on a bright sunny day is reduced. Now I can see the rocks below the surface if the water is clear. And the color of the sky becomes noticeably deeper and the clouds show more detail as the haze is reduced.
Both the sky and the water are prime places to capture birds in action. And polarizing filters help bring out the best contrast from both of these scenes.
Composition tips
Shutter speed is the most important factor of the exposure triangle to consider while photographing birds. This is because they move so quickly and constantly. A slow shutter speed will often create a bit of blur as the bird twitches or flies away.
The exact shutter speed depends on the lighting and motion the bird is making. But unless the bird is absolutely still, I’m looking at nothing lower than 1/250ths of a second. For birds in flight, I need even higher shutter speeds, depending on my distance to the bird and how fast it’s going.
With higher shutter speeds, I’ll need to keep a close eye on my aperture and ISO to ensure the image remains well exposed and not too dark. On a day, it won’t be too much of an issue. But if I’m in the shadows of the forest, I may need to either drop my aperture or increase my ISO to compensate for the fast shutter speed I need to freeze the action.
Catch Light
When taking photographs of birds, keep watch for what’s called the “catch light” in the eyes. Because bird eyes are darkly pigmented and glossy, a bit of spark from the sun or other light sources can reflect there. Catchlights create a bit of a spark of life in the eyes of your subject.
Photo by Earl Goodson
Also, I want to resist the temptation to center the subject in a typical portrait pose. Centered portraits are simply boring. They don’t convey the energy and motion of the subject. Centered portraits are the “still life” of photography.
Rule of Thirds
Instead, I want to catch my subject on one of the intersections of the Rule of Thirds. The Rule of Thirds is a basic photography technique that divides any scene into 9 equal portions using 2 horizontal and 2 vertical lines.
Many cameras have a Rule of Thirds or a grid line setting in the camera menu. The idea is to have points of interest fall on either the lines or the intersections of the lines.
Subjects like birds should be as close to an intersection as possible. While scene features like the sky or a strip of the forest should flow along one of the lines. But once I’ve done it enough times, I can simply imagine the intersecting points as I shoot.
In the below photo, the eye of the swan is the focal point. And it falls roughly on the upper left intersection point.
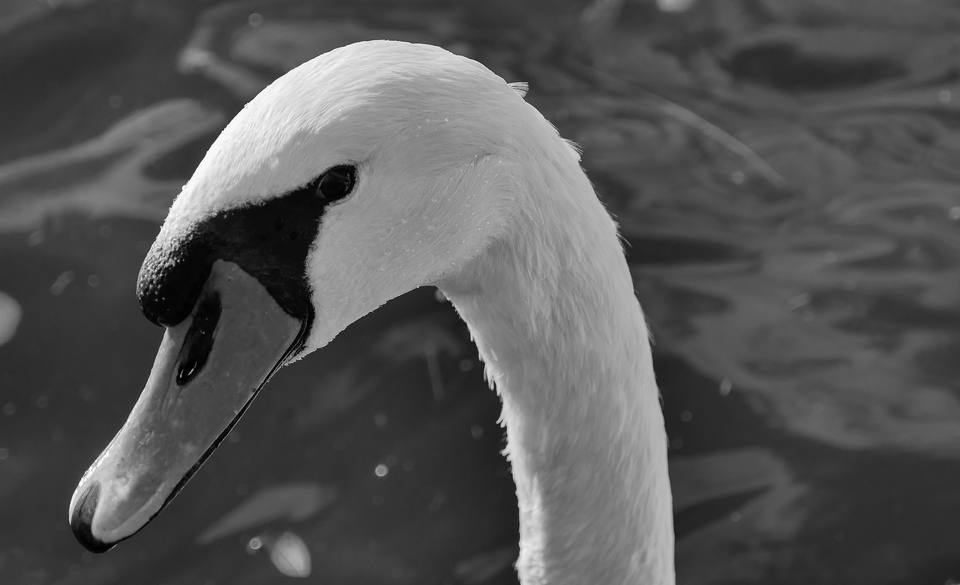
Photo by Earl Goodson
Negative space is also something I should be aware of as a photographer. Empty space adds an important dimension to any photograph. Look at the hawk below as it stares out into empty space.
The negative space is now part of the scene as it’s the abyss where the bird is about to fly into. If I’d centered it instead, I’d simply have a boring portrait with no real story to it.
The Human Element
Bird interactions with humans are another great way to sharpen my photography skills. Going to the park to shoot seems tame compared to shooting pictures of an eagle in the wild. But photographs of pigeons flocking to be fed bread are also interesting in their own way.
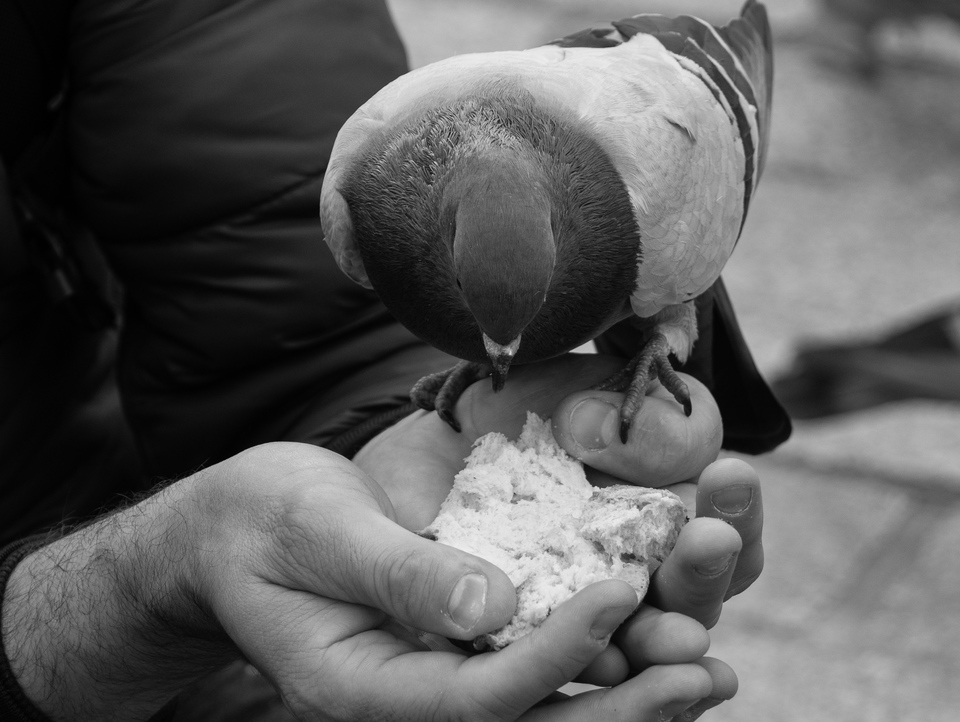
Photo by Earl Goodson
I sometimes bring a loaf of bread and encourage people around to feed the animals while I shoot. Ducks, geese, swans, and pigeons are all beautiful, even if they’re very common. I can take it as a challenge to make interesting photos out of mundane circumstances.
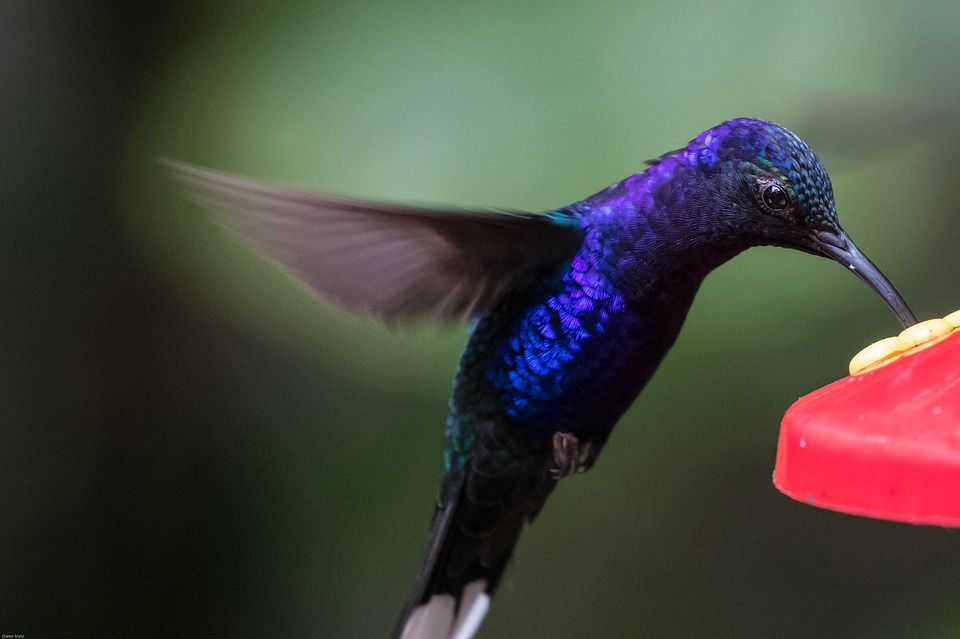
Also, often keep an eye out for or set up my own bird feeders. Nectar bird feeders are one of the best ways to capture shots of the highly elusive hummingbird. If feeders offend your artistic sense, consider local parks and botanical gardens. They attract birds without the photos looking too faked due to attracting elements.
And don’t forget the zoo. Bars may seem depressing for such icons of freedom as birds. But supporting zoos also gives money to be used for captive breeding programs.

Photo by Earl Goodson
Many bird species would otherwise be extinct in the wild if not for the efforts of zoos and scientists. So I take the opportunity to capture extreme close-ups of the faces and feathers of birds there. Lastly, I get the chance to see rare or shy species I’d never otherwise have the chance to photograph, like this owl!
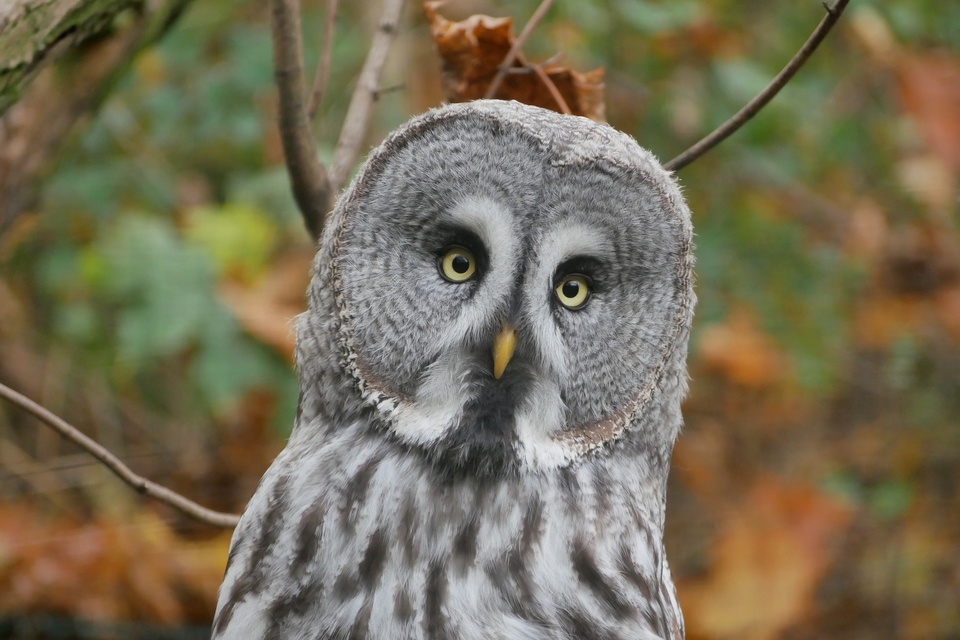
Photo by Earl Goodson
Conclusion
Bird photography is one of my favorite types. It is a very dynamic art that’s not very forgiving because it’s easy to miss the magic moment. If my settings aren’t just right, often I’m left with a slightly blurred photo as the bird makes a motion and then flies off.
Luckily there will always be more magic moments with the right amount of zoom, right location, and the right gear. So I take each one as a learning experience. By honing my skills and learning from every shot I take, I increase the chances of capturing my subjects in just the right pose. Happy shooting!
References
Earl’s Personal Album
http://earlgoodson.smugmug.com
10 Incredible Bird Photography Tips for Beginners
https://digital-photography-school.com/10-incredible-bird-photography-tips-beginners/
An Introduction to Bird Photography
https://digital-photography-school.com/an-introduction-to-bird-photography/


