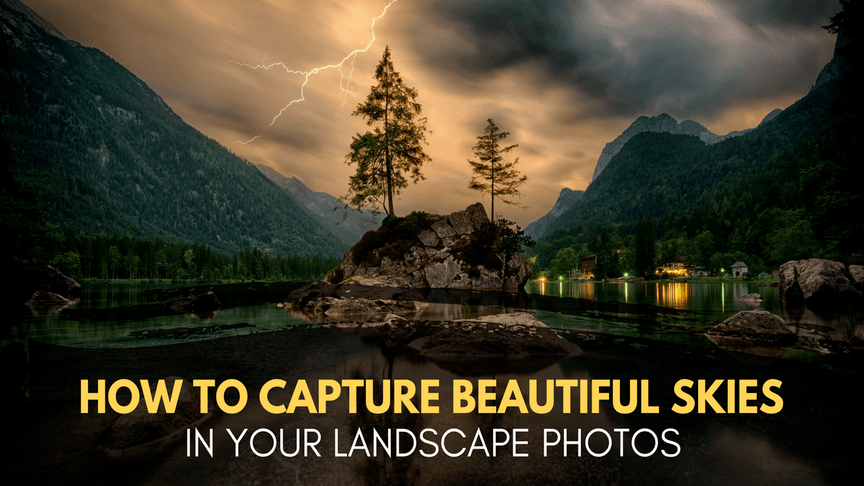
Contents
Wide angle lenses are a big deal
When it comes to lenses that are good for sky photography I really need as expansive a view as possible. And the best thing for that is a wide angle lens. Technically, anything below 35mm can be considered a wide-angle field of view. But a 30mm field of view and a 10mm field of view are very different looking.
Differences in focal length are magnified in the lower ends of the focal range spectrum. The difference between 10mm and 15mm appears much larger than the difference between 295mm and 300mm. The costs of the lenses also reflect this.
When selecting a wide angle lens I want to ensure my lens is good at correcting barrel distortion. Sometimes inferior optics can cause distortions where vertical and horizontal lines look curved slightly or significantly. A good quality wide angle lens will give an expansive field of view without the picture looking artificial.
Sometimes I want a distorted vision, in which case fisheye lenses can be used. Fisheye lenses have a wide-angle field of view, to begin with. But they cram that massive field of view into a single frame which gives them their classic distorted look. A fisheye lens can capture an incredible amount of sky in a single frame.
But even if I don’t want a distorted view a fisheye lens can provide an incredible amount of width thanks to the 180-degree field of vision. By aligning the horizon to be perfectly in the center of the field of view the distortion the lens creates is minimized as far as possible. Secondly, I can use composition elements like clouds or the sun that take away from the slight distortion that will still appear around straight lines in the image.
When using a wide-angle field of view, it’s very easy to capture elements that are less than desirable, such as buildings, power lines, and other man-made artifacts. If they don’t directly contribute to the scene (ex: city skyline) then I need to ensure I compose the image in such a way that I can exclude these distracting elements.
Exposure settings
For a daylit sky scene there’s daylight usually be plenty of light to work with. This means that I can stick to using a lower ISO to ensure my images remain free of noise. ISO is the sensor’s sensitivity to light. The higher the number the more sensitive the sensor becomes but after a certain point image noise begins to creep in. This is because the sensor becomes so sensitive that false positive signals start to become obvious.
So the goal is to use an ISO high enough to ensure good exposure while keeping it low enough to avoid noise. On a bright day, this isn’t an issue. Even on cloudy days the sky rarely changes so fast that I can’t use a slow shutter speed. Though if there are moving elements like trees in the wind, a slow shutter speed will create blurry trees and that may not be what I want.
My aperture setting will generally be moderately narrow to very narrow, in the rage of f/5.6 and beyond. I want to maximize the areas of the depth of field to capture stunning details across the range of the image.
Sometimes I can also use techniques like focus stacking to maximize the sharpness of the image. Focus stacking is a composite image technique where I take several images with differing depths of field and use software to merge them into a single file. The software will analyze every image and always use the sharpest sections to create a single sharp image.
Sometimes if the clouds are moving due to high winds I might decide to use a slow shutter speed. The advantage here is that by doing so I create streaks instead of clouds with distinct borders. The streaks can add an artistic flavor to my images by suggesting the motion of clouds and wind, something that’s otherwise hard to convey in a static image.
The impact of clouds
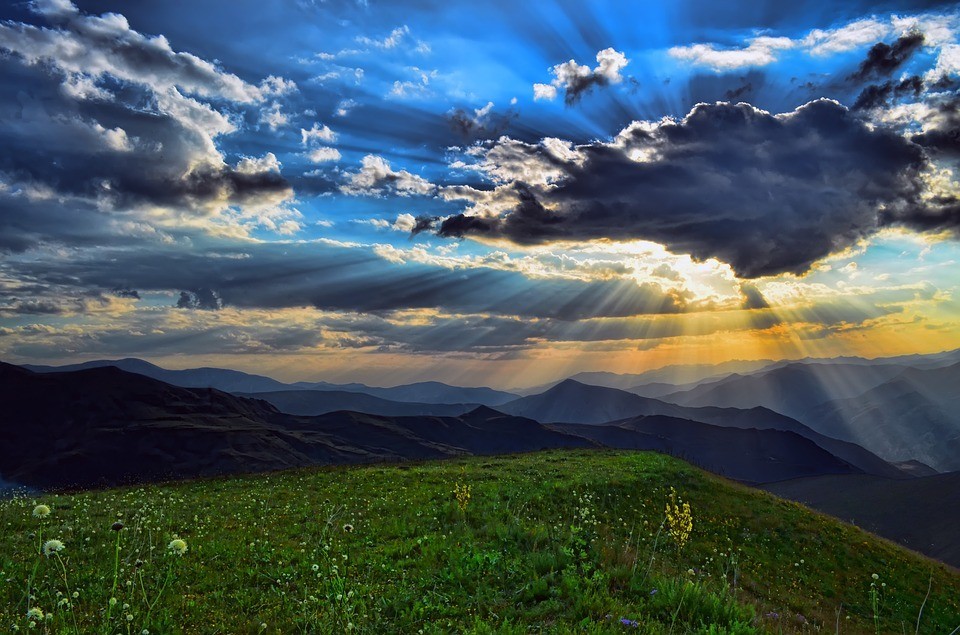
Clouds are a major element of the sky and the random yet aesthetically pleasing shapes of them are worth capturing with a lens. As clouds move across the sky they interact with the sun in various ways. So-called “rays of God” can make for amazing photography on a cloudy day. The moments of transition where clouds are moving to block or reveal the sun give the best dramatic flavor.
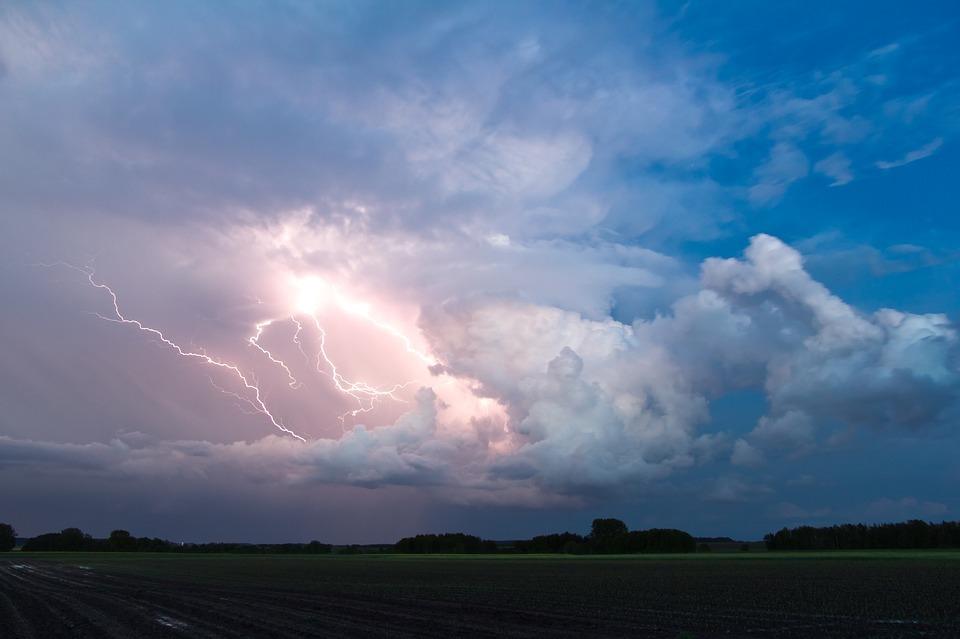
Sometimes photographers think bad weather means the camera has to get packed away. These are wasted opportunities because when the weather turns rough the clouds are usually at their most dramatic. Cumulonimbus storm clouds carry fluffy textures in their dark folds. And lightning is a fascinating photography subject when viewed from a safe distance.
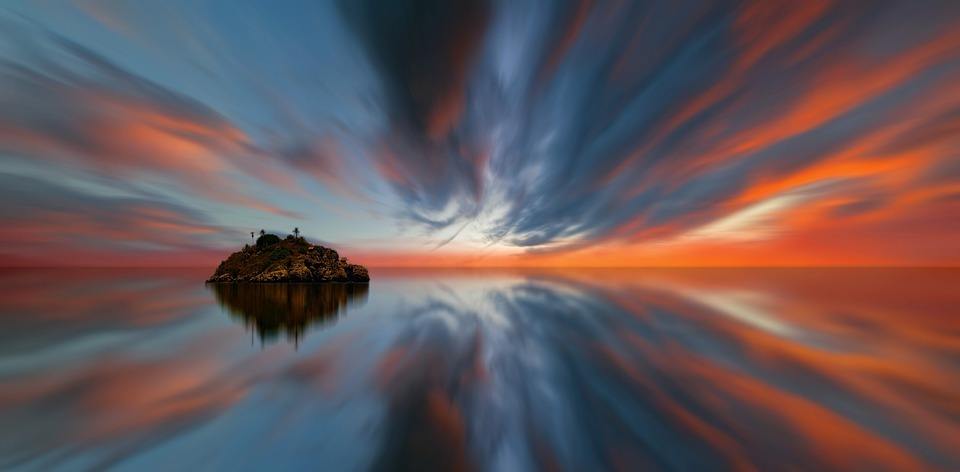
As with photographing water, I can use long exposures in cloud photography to get a smooth effect that’s very suggestive of motion. I need to use a long shutter speed in order to capture the path of the clouds as the wind moves them. Because they move much slower than water I’ll need to compensate using as low an ISO and aperture value as I can to constrict the incoming light flow. More than likely I’ll also need a neutral density filter(s) to reduce incoming light further. This way I can take long exposures even in the middle of the day that capture the motion of clouds and create streaks across the sky.
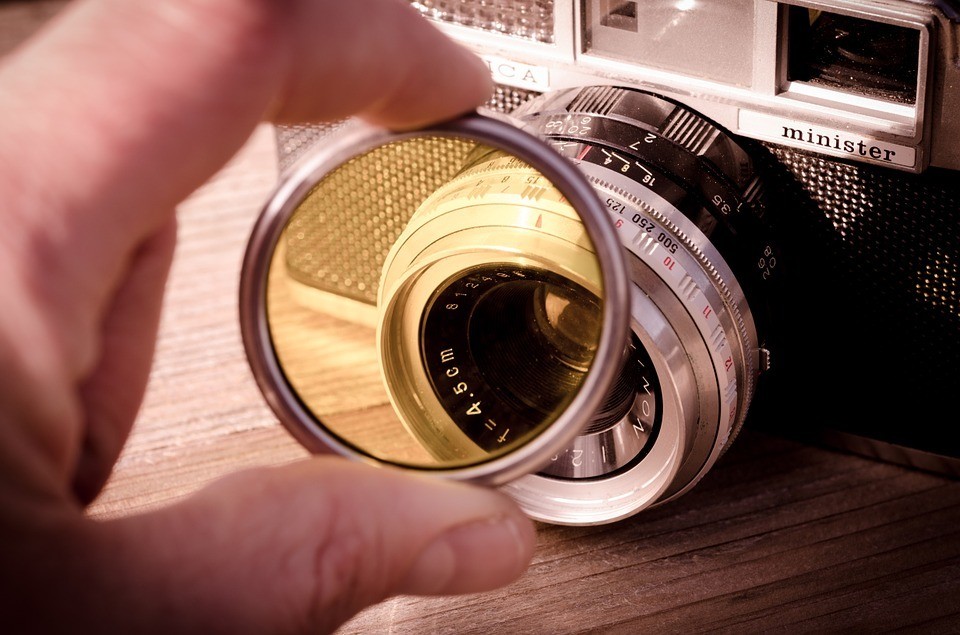
Uses of a polarizing filter
Circular polarizing filters (CPLs) are a tool that every landscape photographer should be using. A polarizing filter works by filtering out scattered light. Why is a scattered light such a big deal?
It’s responsible for creating glare and haze in scenes that can greatly reduce visible details. If I’m shooting a scene with water on a bright sunny day, it will be easy to see how the sunshine leaves glare on the surface of the water. With a polarizing filter I can reduce or eliminate the glare, leaving clear water with a view of the rocks underneath the surface.
The effectiveness of the polarizing filter depends on the position of the sun relative to myself. I want to point the camera lens with polarizing filter attached about 90 degrees away from the sun. if I point at the sun with my index finger the direction my thumb is pointing in will be the direction I want to be shooting from.
The effectiveness also depends on the angle of the sun relative to the horizon. This determines the wavelength and amount of the light being scattered. In this case, the prime positioning for the sun is 37 degrees from the horizon.
One thing to consider is that because light is being reduced by roughly 1-2 stops I’ll need to adjust my exposure to compensate. In landscape photography decreasing the shutter speed is often the easiest way as long as I’m using a tripod.
Graduated Neutral Density filters
Graduated neutral density filters hearken back to the old days of photography. The most common use of them is helping to balance out exposures when you’re working with a bright sky and a dark landscape. Usually the camera will meter for one or the other and the results can look messy.
The filter attaches to the front of the lens just like a polarizing filter would. The darker half is used to reduce some of the incoming light from the over bright sky. If the filter darkens thins too much I can always do some processing in Lightroom to recover exposure as needed.
Most horizons aren’t perfectly sharp. This means a soft edge graduated neutral density filter is my best bet. But if I prefer sharp horizons like shooting out in the desert I can get away with a hard edge instead.
Timing is everything
It seems obvious but the time of day makes a big difference in the type of images you’ll capture. A view that’s scenic at sunrise and sunset may be rather ordinary around noon. The mysterious shadows and golden light give an entirely different flavor to the resulting photograph.
The Golden Hour is one of the best times to do sky photography. Lasting roughly an hour after sunrise and an hour before sunset, the light becomes softer and redder due to having to pass through much more of the earth’s atmosphere. More light comes from indirect, scattered light, which is the opposite of what we’d want if we were using a polarizing filter still. Instead, the scattered light works to create a warm ambience that gives the Golden Hour its name.
During the middle of the day the direct sunlight deepens shadows and brightens highlights. During the Golden Hour shadows and highlights contrast less with each other.
The Blue Hour, the hour shortly before sunrise and after sunset, is another time to create stunning sky photography. The Blue Hour is really more like 20 minutes but the name works better as it is. During this period blue light is scattered instead while red light ends up mostly leaving the atmosphere. This gives the deepest possible blues and purples. Because the sun is so low to the horizon the Blue Hour also tends to be much darker than the Golden Hour.
Fortunately, there are several modern aids to ensure I’m ready at precisely the right time for stunning Golden Hour or Blue Hour photography. I can use this app to determine my local Golden Hour. A Blue Hour variant also exists for Android or iOS.

Other composition elements to consider
Cloudy skies also add texture and interest to an image. Their color shifts dramatically depending on the ambient lighting and atmospheric conditions. What’s a field of average looking white clouds can become fiery orange underneath and a smoky purple on top at sunset.
Another way to maximize the impact of a beautiful sky is to include reflections. Water is the first place people think of and it works extremely well. On a still day a lake appears to be a mirror to the open sky above. There are even locations around the world, usually in the middle of the harshest deserts on the planet, where clear, nearly perfectly reflective lakes exist. The lakes are so still and reflective that it can appear as if there are two skies in one scene.
But there’s more to reflections than water. Glass and metal on buildings and other man made artifacts also provide excellent reflections to works with. I sometimes become a street or architecture photographer and walk among skyscrapers with glass windows on a bright sunny day. The sky will reflect from the exterior glass and create stunning imagery. The geometric straight lines of the building also contrast well with the natural, organic shapes of the clouds.
People work surprisingly well in sky photography as silhouettes or appreciative viewers. The image of a man or woman with arms outstretched looking out into the expanse of open sky is iconic for good reason. Silhouettes are harder to work with, especially if your camera is set on Auto mode. You’ll want to ensure your subject is backlit by the sun with you shooting towards the light. That way the camera should meter for the main light source of the sun and sky, leaving the subjects underexposed. Silhouettes give a romantic anonymity that makes it easier for the viewer to imagine themselves in that same setting.

Conclusion
Sky photography is something that’s incredibly fun once you understand the fundamentals. Many people ignore the sky in favor of flashier targets yet the advantage of the sky is that it’s always there, ready for your interest and skill behind a camera. With a bit of knowledge on timing and where the best locations lie anyone can create rich images full of life and wonder from the unassuming simplicity of the open sky!


