Contents
- Common Questions about Low Light Photography
- What is low light photography noise?
- What are some simple ways to counteract image noise?
- What is Exposure Compensation and how does it relate to low light photography?
- What is ISO invariance and why should I be looking for it?
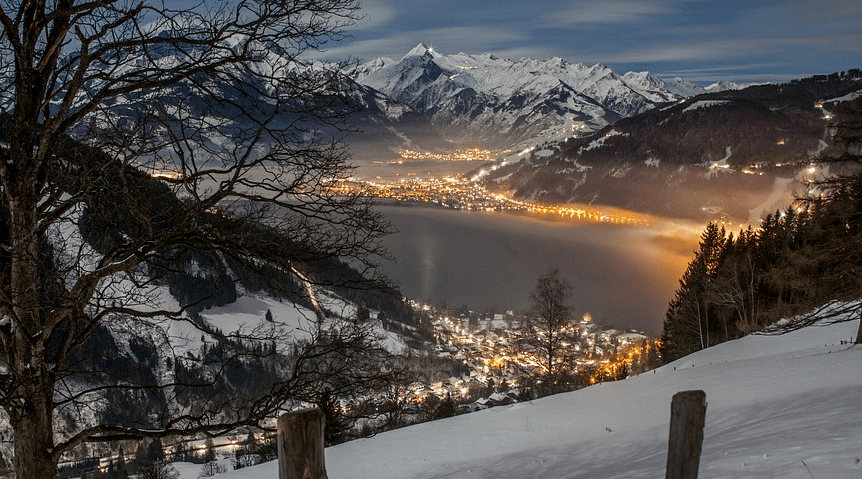
- What about night photography?
- How do I photograph moving objects in low light situations?
- What can I do as a landscape photographer who loves forests in low light settings?
- What can I do as a low light concert photographer?
At any point, I can also stop to consider the other two parts of the exposure triangle. I can lower my shutter speed to allow more light to enter the sensor. Think of shutter speed as a blinking eyeball. Slow shutter speed is equivalent to staring at a light source while a fast one is a rapid blink that lets in much less light.
I can also adjust my aperture. Using the eyeball example, the aperture is similar to the pupil. Expressed as f/stop numbers, an open aperture like f/1.4 is like a widely dilated pupil. Lots of light can enter my camera and strike the image sensor (pupil and retina). We can also call this a “fast” aperture.
A narrow, closed, or “slow” aperture, like f/16, is a narrow pinprick of a pupil. Much less light is entering the eye to strike the retina. Another effect of controlling aperture is controlling the depth of field of the image. Using an open aperture, I can create an image with a subject in sharp focus and a blurry background. And using a closed one, the background will come more and more into focus.
Portrait photographers tend to use mostly open apertures while landscape photographers prefer closed ones. All three of these factors help me make the most out of available light when the lighting becomes difficult. But what about the tech? So what are the best cameras for low light photography?
#1. Nikon D5
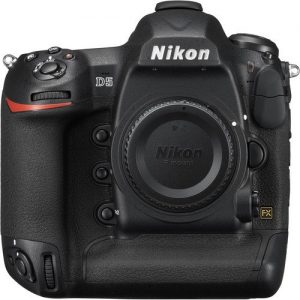
- Megapixels: 20.8
- Sensor Size: Full frame (sized 36.00 x 24.00mm)
- Weight: 1415 g (3.12 lb. / 49.91 oz.)
Pros: The Nikon D5 is the professional body to have on the market right now. It is packed with features that would take pages to list.
But some of the most important ones include an incredible ISO sensitivity of up to ISO 3,280,000 (with a usable ISO of 100 to 102,400) and a blazing fast 153 autofocus point system with 99 cross-type points that tracks subjects in incredibly dim lighting.
4K Ultra High Definition (UHD) video recording at 12 frames per second continuous shooting that works in tandem with the incredible AF tracking system makes the D5 the most capable camera here.
Cons: This camera is massive! With batteries, the Nikon D5 weighs in at an incredibly chunky 1415 g (3.12 lb.) making it by far the heaviest camera here.
The D5 is geared towards photographers who want image quality at all costs. And the D5 will indeed cost you. It’s also the most expensive camera listed. And that’s just for the body. I’ll also want a selection of quality lenses to ensure I have premium image quality. The D5 is not a budget camera choice.
#2. Sony a7S II
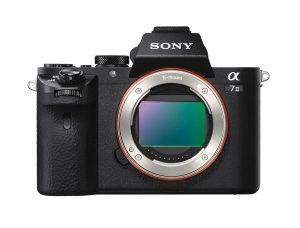 Megapixels: 12.2
Sensor Size: Full frame (sized 36.00 x 24.00mm)
Weight: 627 g (1.38 lb. / 22.12 oz.)
Pros: This camera can very nearly see in the dark. It’s sensitivity to colors goes beyond that of the human eye. And when shooting in RAW, I can use ISO invariance to recover tremendous detail. I’ll explain more about ISO invariance later but trust me, it’s definitely something to look out for in low-light cameras.
Because the Sony a7S II is a mirrorless camera it has an incredibly compact design compared to the DSLRs on this list. At 627 g it’s the second lightest camera here after the Sony a6500 and one of the smallest full frame cameras you can buy.
The low resolution can be a drawback (see below), but it also has a surprising benefit. Because the sensor is so large and the megapixel count so low, each pixel is far larger than those of other cameras.
While sensor size gives a large area for light collection, larger pixels are also more efficient at harvesting light than smaller ones. The a7S II has not only the largest sensor size commonly available but huge pixels that suck in light. Overall, the a7S II is your best bet when it comes to low light performance.
Cons: The low resolution of the sensor means it’s not very good if you create prints beyond 8 x 10 inches. You will rapidly lose sharpness and resolution in large prints because the 12-megapixel sensor’s huge megapixels are great for gathering light but poor at fine detail capture.
Being a mirrorless camera the Sony a7S drinks batteries like water. This is because mirrorless cameras don’t have pentaprism viewfinders like DSLRs do.
A DSLR camera uses a system of internal mirrors to channel light to the viewfinder and phase detection autofocus system. This gives them a significant edge when it comes to battery life that mirrorless cameras like the Sony a7SII and a6500 don’t have.
#3. Canon 6D Mark II
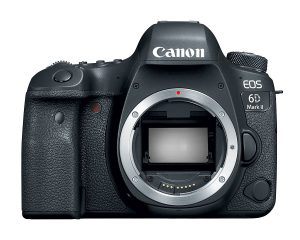
Megapixels: 26.2
Sensor Size: frame (sized 36.00 x 24.00mm)
Weight: 765 g (1.69 lb. / 26.98 oz.)
Pros: The 6D Mark II has the backing of one of the most popular brands in the DSLR world. Canon lenses come in a dizzying array and that gives the Mark II user hundreds of choices to work with.
The full frame sensor has 26.2 megapixels which seem low considering 24 megapixels is the standard for most APS-C sensors on the market today.
But not only is full frame larger but because the 6D Mark II doesn’t have especially many megapixels the individual pixels can afford to be larger. This gives them a greater ability to collect light compared to a full frame camera with more megapixels. Pixel size isn’t everything, but the 6D Mark II has a good balance of megapixels to sensor size.
Cons: The 6D Mark II is not an ISO invariant (ISO-less) camera. Even when shooting RAW it does not allow me to recover quite as much detail if I shoot an underexposed image and then try to brighten it with software. An ISO-less camera like the a7S or Pentax K-1 does a much better job in post-processing underexposed images.
#4. Sony a6500
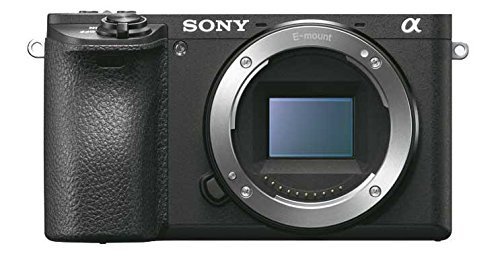 Megapixels: 24.2
Sensor Size: APS-C (sized 23.60 x 15.60mm)
Weight: 453 g (1.00 lb. / 15.98 oz.)
Pros: Not only is the a6500 mirrorless, which gives it extra compactness, but it’s also the lightest camera on the list.
At 453 g the a6500 can fit into a pocket once the lens is removed – or with a pancake lens attached.
The a6500 is also weatherized, allowing the camera to operate normally when light rain and dust might prevent me from shooting. The sensor even has image stabilization built in to counteract motion blur that can occur from hand motions. This makes shooting at slow shutter speeds without a tripod even easier.
Cons: The smaller APS-C sensor of the a6500 has impressive low light performance given the size of it. But it still has a smaller surface area compared to a full frame sensor which means the amount of light it can collect is limited. But if you’re dedicated to APS-C crop sensors (maybe you own a large collection of Sony E-mount lenses) the a6500 is one of the best on the market when it comes to low light performance.
#5. Pentax K-1
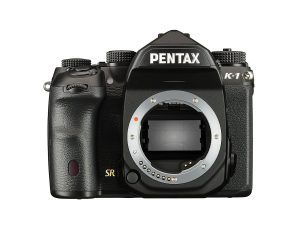 Megapixels: 36
Sensor Size: Full frame (sized 36.00 x 24.00mm)
Weight: 1010 g (2.23 lb. / 35.63 oz.)
Pros: The Pentax K-1 is chock-full of incredible features. It’s geared mostly towards landscape and nature photographers but has the stats of a camera well suited for any type of photography with the right gear. The 36-megapixel sensor also has 5-axis image stabilization built in to ensure handheld images don’t lose sharpness if my hands shake too much.
The K-1 is an ISO-less camera as well, which means RAW files will preserve far more data in the shadows and highlights if given normal exposure later in software like Adobe Lightroom. This lets me use shutter speeds and ISO settings that would usually be too dark with less worry.
Lastly, at 36 megapixels the K-1 has the highest image resolution of the cameras listed here. Photographers who like to create large prints will find even the largest photographs will retain stunning detail. And any cropping can be done much more aggressively compared to other sensor resolutions without too much loss in resolution.
Cons: While not as bulky as the Nikon D5 the Pentax K-1 is a large camera. At just over a kilogram this isn’t a camera that’s easily stowed away during a family vacation. The K-1 is geared towards professional photographers and has professional image quality and features, but its size can be a hindrance.
Pentax lenses are also not always easy to find. Nikon and Canon take up the vast majority of the DSLR lens selection of major retailers. Pentax is relatively unknown, and while the lenses are very high quality, the selection is rather small in comparison.
#6. Nikon DF
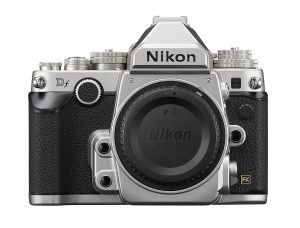 Megapixels: 16.0
Sensor Size: Full frame (sized 36.00 x 24.00mm)
Weight: 760 g (1.68 lb. / 26.81 oz.)
Pros: The Nikon DF uses the same full frame sensor as the Nikon D4. The D4 was as expensive as the D5 upon release and getting that incredible sensor at a much lower cost than the D4 or D5 makes the DF worth considering.
The design of the camera is either a pro or a con, depending on what you value. Professional photographers who want a body that reminds them of shooting with a film SLR camera will love the layout combined with the extremely high-quality full frame sensor.
The lens mount of the Nikon DF is also designed to use nearly every Nikon lens on the market today. Legacy lenses which have fine optics without all of the modern technological additions can be found online and in pawn shops for under $100. Combined with the retro body of the DF your choice in gear will certainly be turning heads and inspiring questions!
Cons: The Nikon DF is designed to mimic old film cameras, and this includes the operation of the buttons, dials, and other camera functions. While many of the settings are still modern the mostly manual handling of this camera is a nightmare for photographers dependent on automatic settings. Nikon styles it along the lines of “the love of photography,” evoking romantic notions of slow, manual changes and a dreamy pace. But if you prefer capturing images as quickly and accurately as possible, the DF will be frustrating.
Common Questions about Low Light Photography
What is low light photography noise?
A more scientific definition of noise would be “the visual manifestation of a lower signal-to-noise ratio.” This means that noise from other sources begins to overwhelm the imaging capacity as the pixels of your sensor struggle to find a good signal. Noise, in this case, is unwanted signals that have nothing to do with your final image.
Random photons bouncing around from the environment can strike the sensor and cause a false positive signal. The photons are not of the wavelengths we’re looking for (visible light). They also aren’t all arriving equally, but rather in pulses and waves that even in the short time the shutter is open create a cacophony of signals that the camera sensor can never quite interpret correctly. This is called front-end or photon noise.
The second is called back-end or read noise and comes from the camera itself. Heat from the operation of the sensor can cause noise to come up. As does imperfections that arise when the pixels reset after an image is taken. Noise can come from a variety of sources but the result is more or less the same: a graininess to an image. This graininess simply has a film quality at higher ISO levels that’s normal.
The problems with noise become worse as we increase the ISO which is the sensor’s sensitivity to light signals. When using a low ISO, we are usually working in a brightly lit environment. This means there’s a literal flood of light that ensures there’s very little confusion as to what is and isn’t a proper signal. So the pixels don’t have to work as hard, and the resulting image is going to be free of noise.
Shooting in dark settings also makes the problem worse because of the composition of the image. If most of the elements of the scene are dark colored noise elements are going to be more visible than they would in a bright or colorful stage, even if the amount of noise in the two images is the same.
What are some simple ways to counteract image noise?
As light levels decrease I need to increase my sensitivity to ensure the pixels capture enough light – but the increased sensitivity also means the lower frequency signals have a higher chance of creating false positives that show up as image noise. This is why it’s almost always preferable to increase my shutter speed or aperture instead. Greater access to actual light keeps image noise down while increasing my sensor sensitivity increases image noise.
Sensor size
Sensor size is another important consideration. The larger the area of the sensor, the higher the amount of light it can gather to generate an image. Therefore, a point and shoot camera in a low light setting is going to create far more noise than a camera with a larger sensor, but the same megapixel count.
Megapixel count
The megapixel count itself is also part of the noise equation. Larger pixels are more capable of collecting light. Therefore, the ideal low light camera has a huge sensor with a low megapixel count. That’s why the Sony a7SII, with its 12.2-megapixel count and full frame sensor, is considered the best consumer-level digital camera on the market for low light photography.
But sometimes there’s just no choice. If I have to shoot an event with moving people and I don’t have a tripod and can’t use a flash. Therefore, increasing my ISO or using the exposure compensation tool is my best bet.
What is Exposure Compensation and how does it relate to low light photography?
Exposure compensation is a great tool in low light situations because my camera’s software is only so intelligent. When it detects a dark scene, it wants to use settings that will ensure “proper exposure, ”if you wish to preserve the dark ambiance or not. And if you’re using anything other than Manual, like Aperture or Shutter Priority mode, then the camera will do its best to make the scene brighter.
What I can do instead is use the exposure compensation button/dial before I shoot to add exposure as needed.
Perhaps to +1/+2 EV. And the resulting photo will be brightened considerably.
It’s important to remember that you must be using a mode that relies on the camera’s metering tool to gauge exposure. If you shoot using Manual mode, you won’t be able to use exposure compensation because the camera is set to be as hands off as possible (unless you have Auto ISO engaged – then the camera knows it can fiddle a little bit). Otherwise, exposure compensation can be used with Av (Aperture Priority), Tv (Shutter Speed Priority), or any of the scene modes that come with my camera.
What is ISO invariance and why should I be looking for it?
ISO invariance is a handy feature to look out for when searching for a low light photography camera. It’s quite technical, but the easiest way to explain it is to say that when shooting in a RAW format it doesn’t matter much if you underexpose an image. If I later add exposure in Adobe Lightroom, the resulting image will look as if I’d exposed with the proper ISO. We can call a camera with this sort of RAW processing ISO-less.
What are the effects of low light on various types of photography?
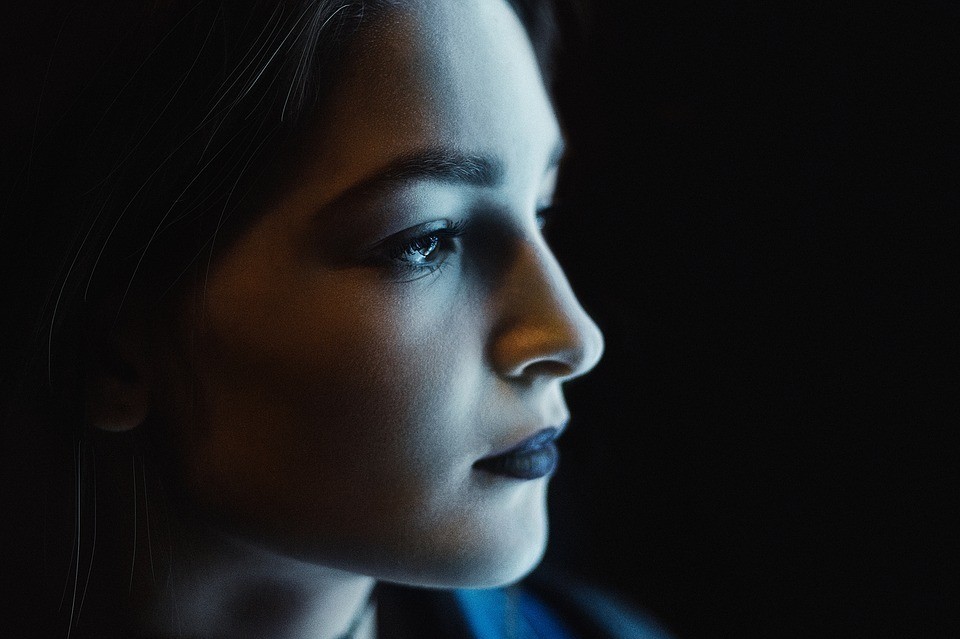
It can add to or take away from what you’re trying to do, depending on the style you prefer. As a portrait photographer, it can add ambiance to an image. And because you’re already going to be using wide open apertures for a shallow depth of field, you won’t have nearly as many issues capturing good images. Portrait photographers usually have a tripod at the ready as well to maximize image sharpness so low light levels aren’t quite the struggle it is with other forms of photography. Sensor size is the primary constraint here.
Landscape and other outdoor photographers
On the other hand, landscape and other outdoor photographers will struggle with low light settings. This is because they prefer using narrow apertures that maximize the depth of field of the photograph. And that narrow aperture constricts the amount of light available even further. This makes using a tripod mandatory and increasing your ISO and shutter speed to compensate. The exposure compensation tool can also help ensure your image is exposed correctly.
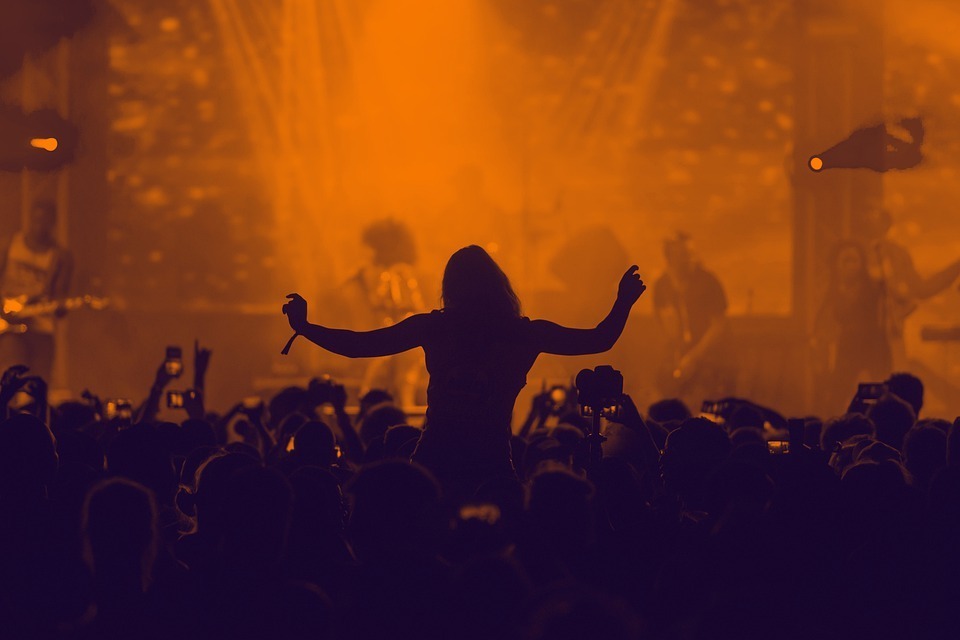
Event photography
Event photographers probably have it worst of all. If I’m shooting a concert or wedding in a low light environment, I don’t always have the luxury of having a tripod to haul around. I’m as likely to be on my feet trying to find the best angle while staying out of the way. And I have to use decently fast shutter speed. Otherwise, my subjects will become blurry. I could crank up my ISO but if I’m delivering quality pictures that need to be clear and noise free…What do I do?
Having a large sensor and wide open aperture are the only way event photographers can expect to create clear, crisp images in darker settings. A f/1.4 prime on a full frame sensor will do wonders for my work. Having a stabilized image sensor like that of the Pentax K-1 or Sony a7SII also helps me achieve further clarity without using a tripod.
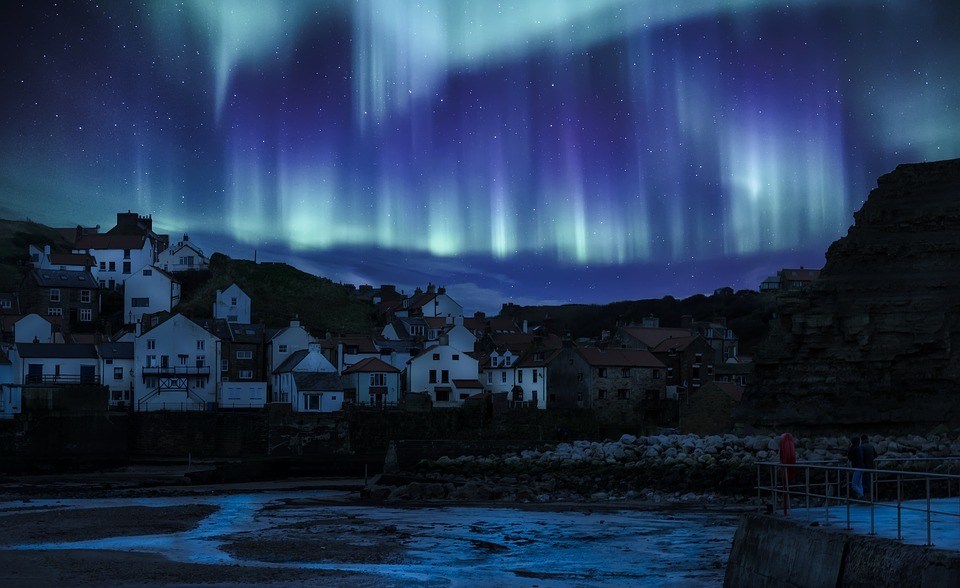
What about night photography?
Night photographers by definition work in low light. And to get clear images of the Milky Way or star trails I need to learn how to work with the tiny amounts of light available.
The first thing that helps is to get as far away from civilization as I can. The light pollution of cities is immense. In the heart of a major hub, I may only see a couple of stars due to the scattered light from the city drowning out the starlight. By going out into the far countryside, I can keep that city glow from interfering with my images.
Next, I need a tripod, no exceptions. When working with astrophotography, shutter speed times start at around 30 seconds and only go up from there. Or, working with an intervalometer, I might be taking dozens of images 30 seconds apart to capture the movement of stars across the sky. I need stability with night photography.
How do I photograph moving objects in low light situations?
I need a fast shutter speed to freeze the action of a moving subject. But this cuts down on the amount of light available. Fortunately, I still have several options available, depending on what sort of scene composition I’m going for. I could open my aperture to allow in more light. This works so long as I don’t mind a blurred background and a sharp subject. If I want the background in focus then I have to use a narrower aperture, which is also cutting down on the amount of light entering the scene. Therefore, boosting my ISO or using the Exposure Compensation tool is required.
What can I do as a landscape photographer who loves forests in low light settings?
Sometimes keeping things dimly lit is what I want and this is especially true with a landscape scene where I want to preserve the ambiance of a dark forest. Fortunately, as a landscape photographer, I have the most natural time creating a good image.
Aperture
One major factor I will be considering is my aperture. Because I’m taking a landscape image, I’ll usually need a depth of field that’s quite deep. The depth of field is how much of a scene is in sharp focus, and it’s controlled by the aperture setting. I might use an aperture of f/8 or more if I’m looking to get an entire forest and background mountain into focus. But that narrow aperture means less light is entering so I need to increase the other foundations of the exposure triangle to compensate.
There is little motion in my image so long as the wind isn’t causing trees to move. This means I can use any shutter speed I need to. If I’m close to the trees and there’s some wind, then I may need to rethink shutter speed. But if I’m standing on a cliff looking over a forest in the early morning, then I can use a nice, long exposure time to let light trickle into my narrow aperture.
Shutter speed exposure time
And because I need a longer shutter speed exposure time, I’ll have to use a tripod to provide stabilization. Depending on the scene, light levels, and my aperture and ISO settings, I may need shutter speed times as long as 1 second or more. If I tried shooting that handheld, I would get a blurry mess, no matter how stable I believe I can hold the camera.
Fortunately, as a landscape photographer, I’ll often have time to play with my settings to try and get them right. Landscapes are not static entities. Clouds and the sun can shift and play with the overall exposure as much as your settings will. But the shifts are slower and usually give you time to work things out.
What can I do as a low light concert photographer?
Unlike the landscape photographer, I can use a wide open aperture as an event photographer. But the flip side is that I need to use faster shutter speeds if I want to avoid having my subjects look like a blurry mess. And I sometimes can’t even use a tripod because everyone around me s moving and I need to move to get the best angles for composition!
Low light event photography is very challenging from a technical perspective. I need the utmost knowledge of how to work with exposure. And I also need fine gear. The sayings about it being more about the photographer than the gear are true as far as it goes. But trying to shoot handheld at a wedding in a dark church with a cropped sensor and a kit lens with a maximum aperture of f/4 is going to be impossible no matter how good I think I am. I should be using a full frame body with a nice f/1.4 lens and maybe some sensor stabilization is thrown in to ensure I never miss a shot.
Conclusion
Low light settings are sometimes seen as the worst possible challenge to a photographer. And if I’m caught unprepared for a low light situation, then they indeed can be. I would be very reluctant to present to paying customer images full of noise and blur because I didn’t have the technique or gear to expose my images correctly.
Therefore, this guide will hopefully prevent you from ever having to find yourself in such a situation. Low light settings can be as fun as they are challenging. Spend extra time thinking about your gear if you want to be shooting in challenging light. Sensor size, sensor stabilization, and megapixel count (for overall pixel size) are significant factors to consider. With the list above you can find the best cameras for low light photography.
If the camera is ISO invariant, then you can post-process your images later in RAW and increase the exposure without increasing image noise any more than you would have shooting at the native RAW setting. And never forget the exposure triangle or the exposure compensation tools.
Sources:
https://www.dpreview.com/products/compare/side-by-side?products=nikon_d5&products=sony_a7sii&products=canon_eos6dmkii&products=panasonic_dcgh5&products=sony_a6500&products=pentax_k1&products=nikon_df&sortDir=ascending
https://www.adorama.com/alc/0012955/article/FAQ-What-is-Noise-in-a-Digital-Photograph


